Build, tag and release an application
In this tutorial, you will create a CDS Workflow with the Web UI.
- Create a workflow using two pipelines: one for building, a second for tagging
- You will discover the GitTag action, which create tag compatible which Semantic Verstionning 2.0.0
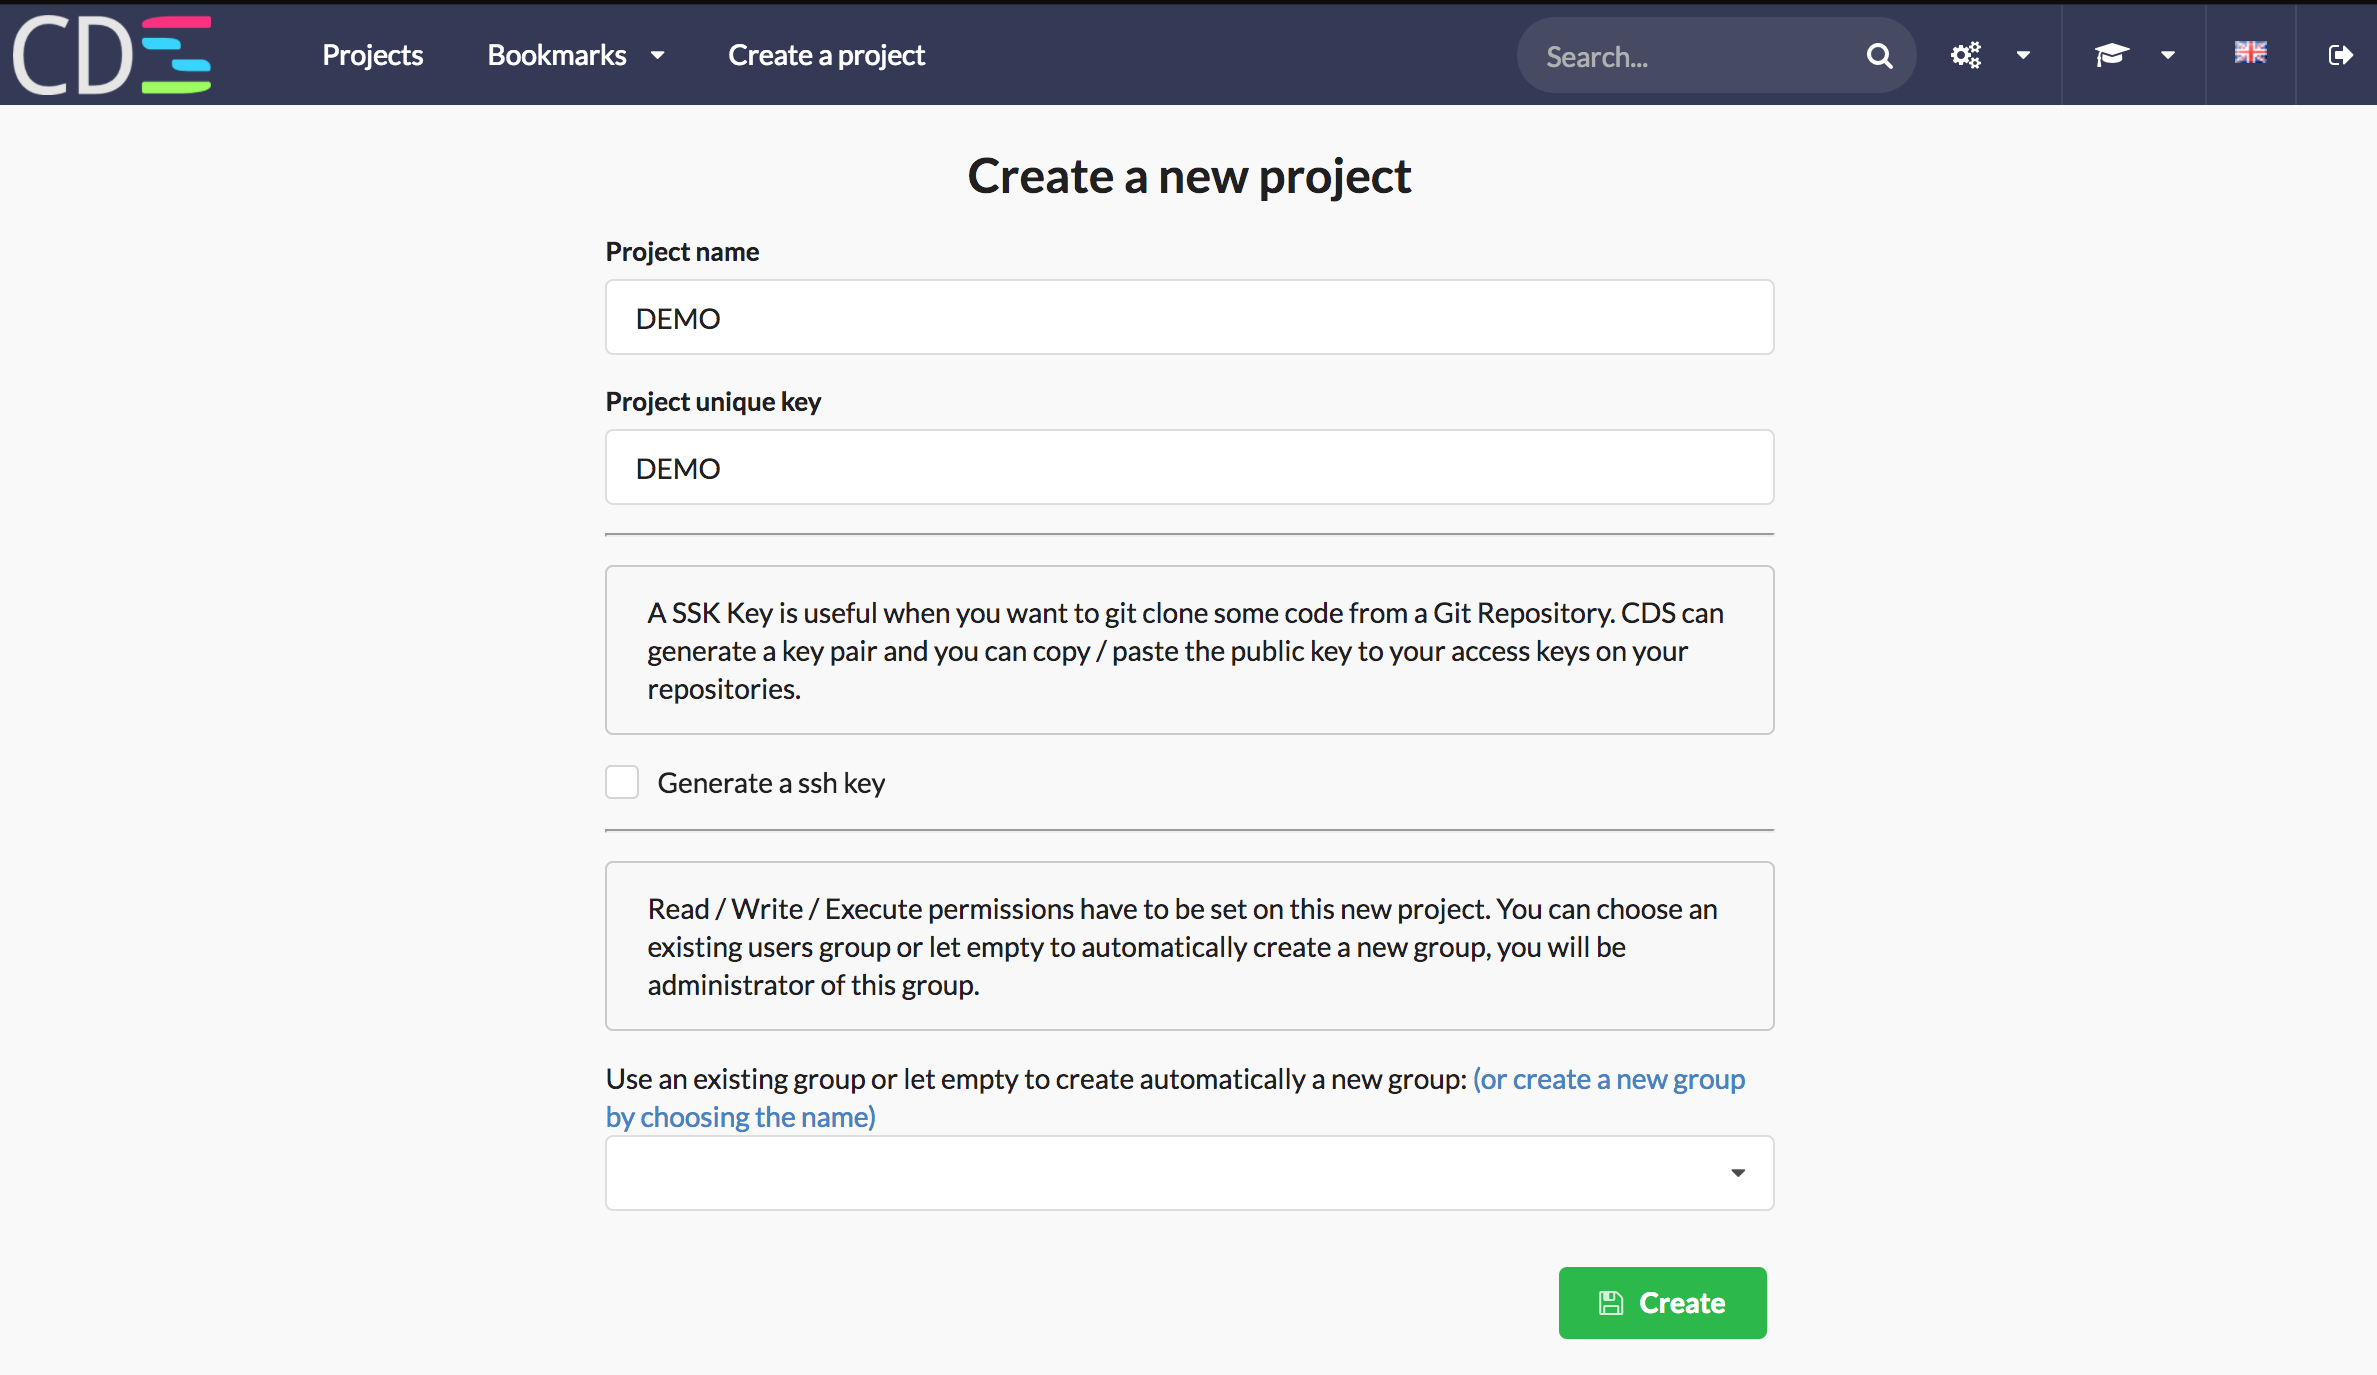
1 - Create your CDS project
Let’s create a project. On the top navbar, click on ‘Create a project’.
- Enter a Project Name
- The project key will be useful when you want to use cdsctl.
- Click on ‘Create’ button.
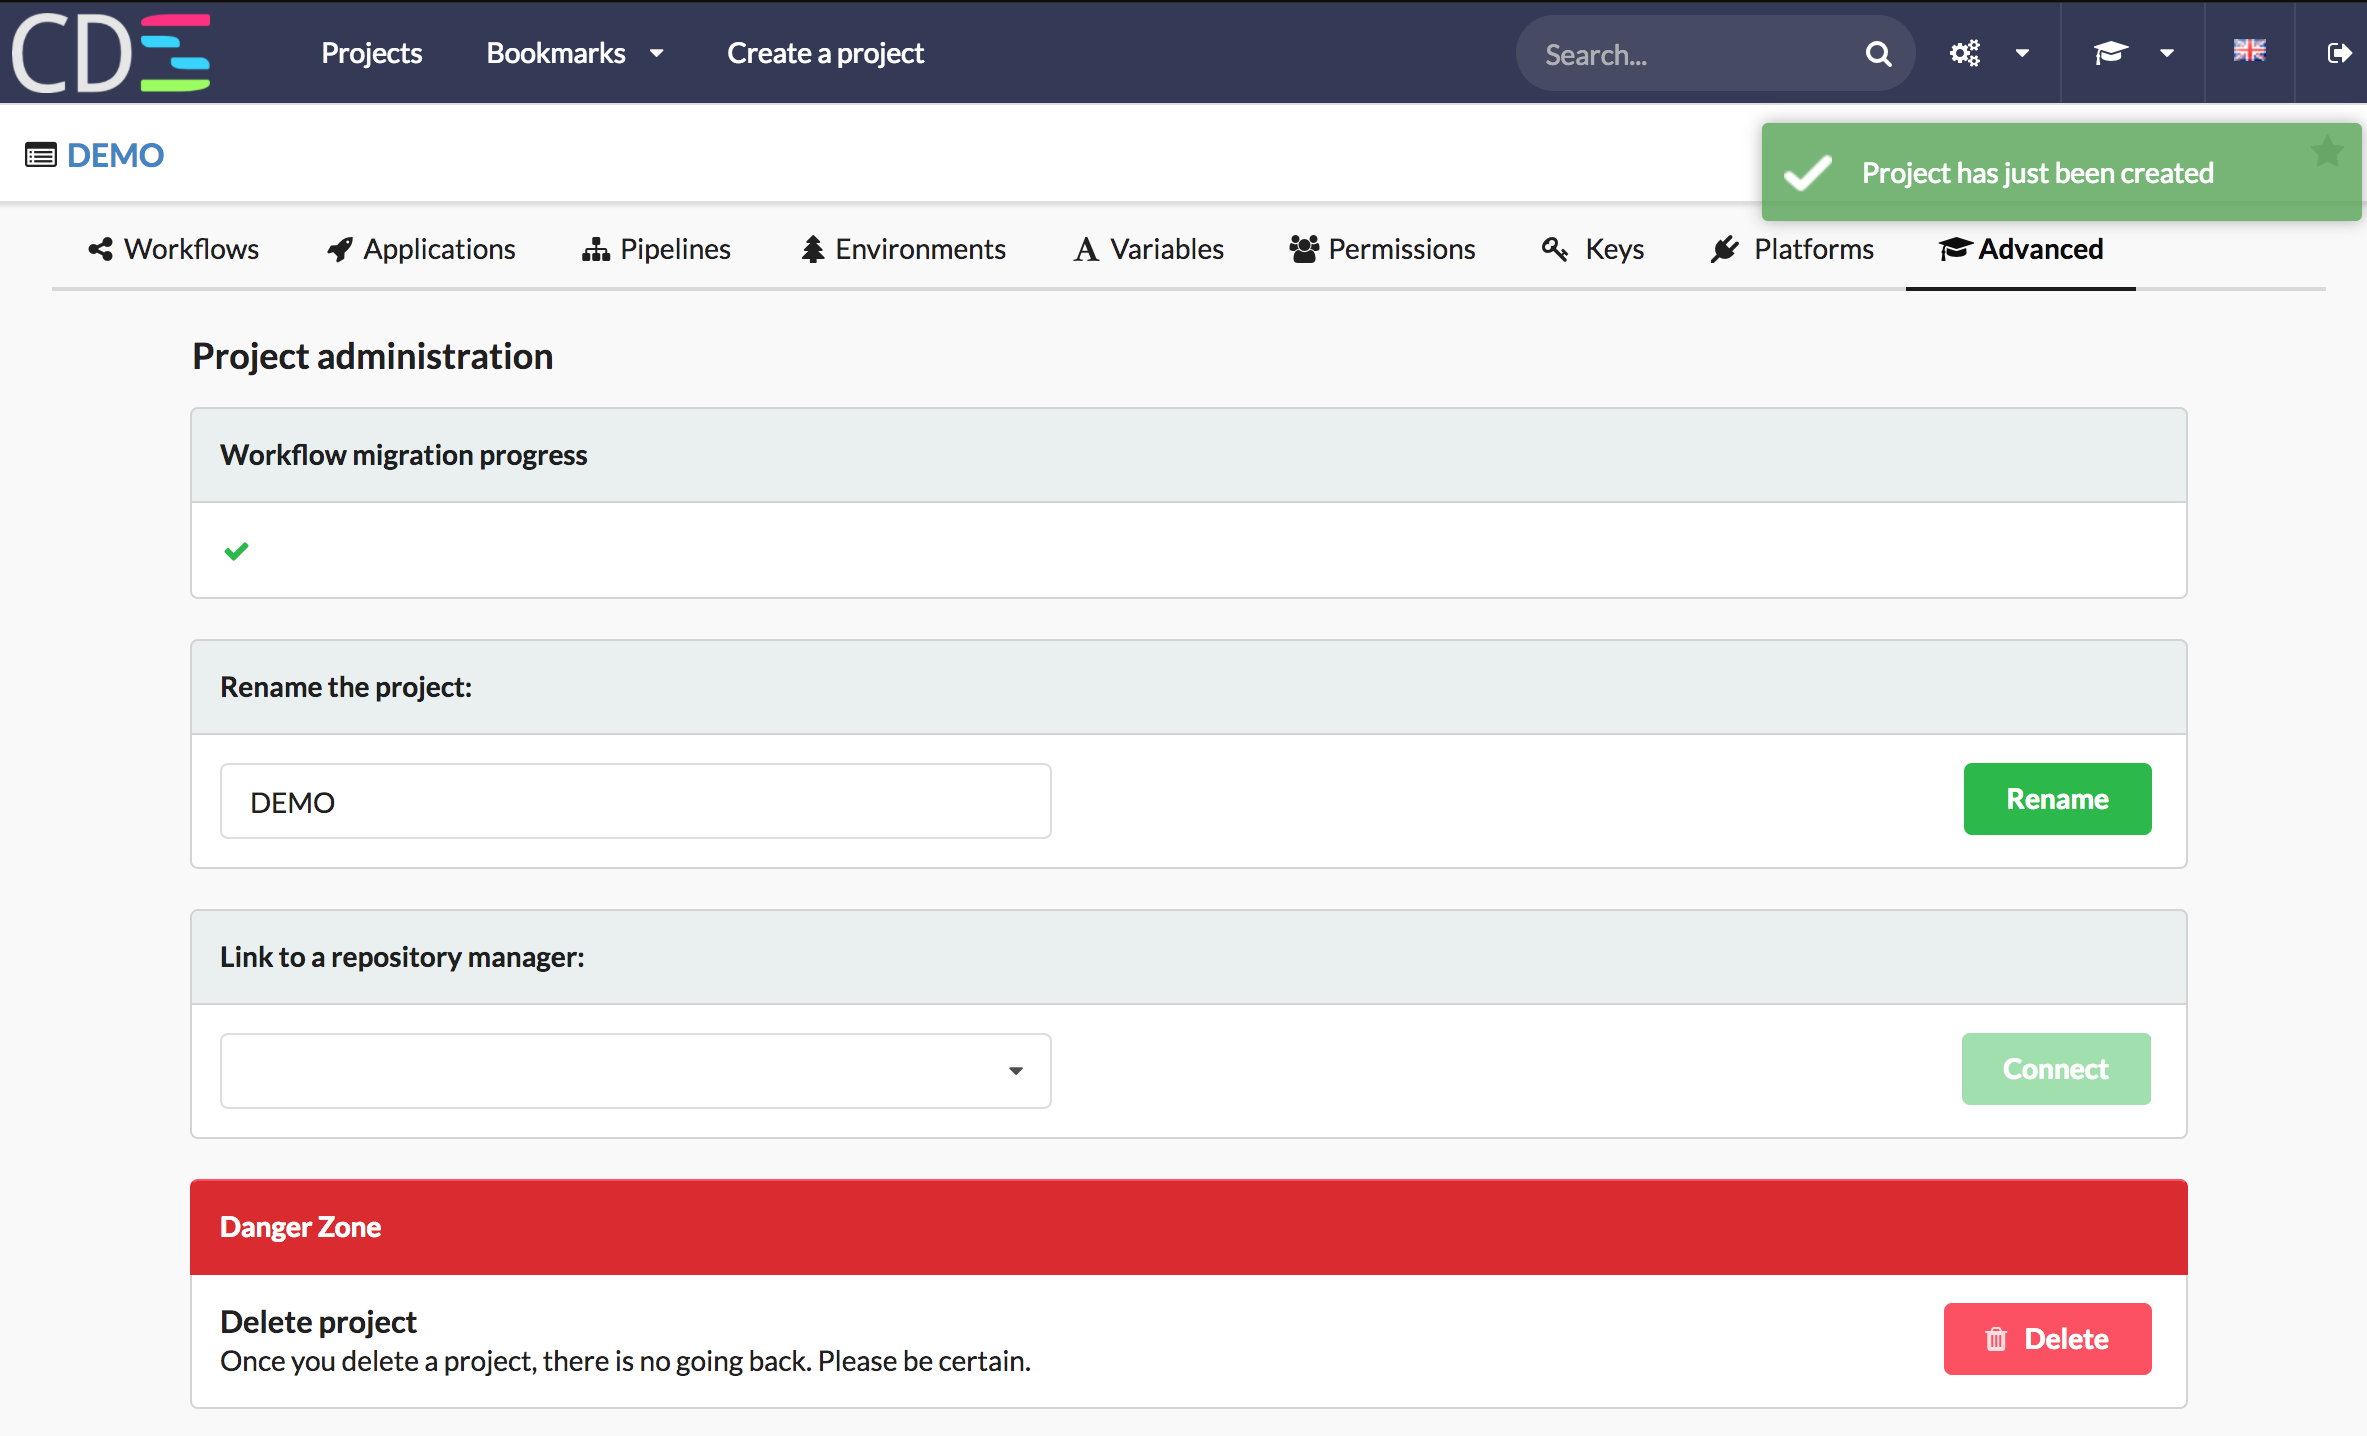
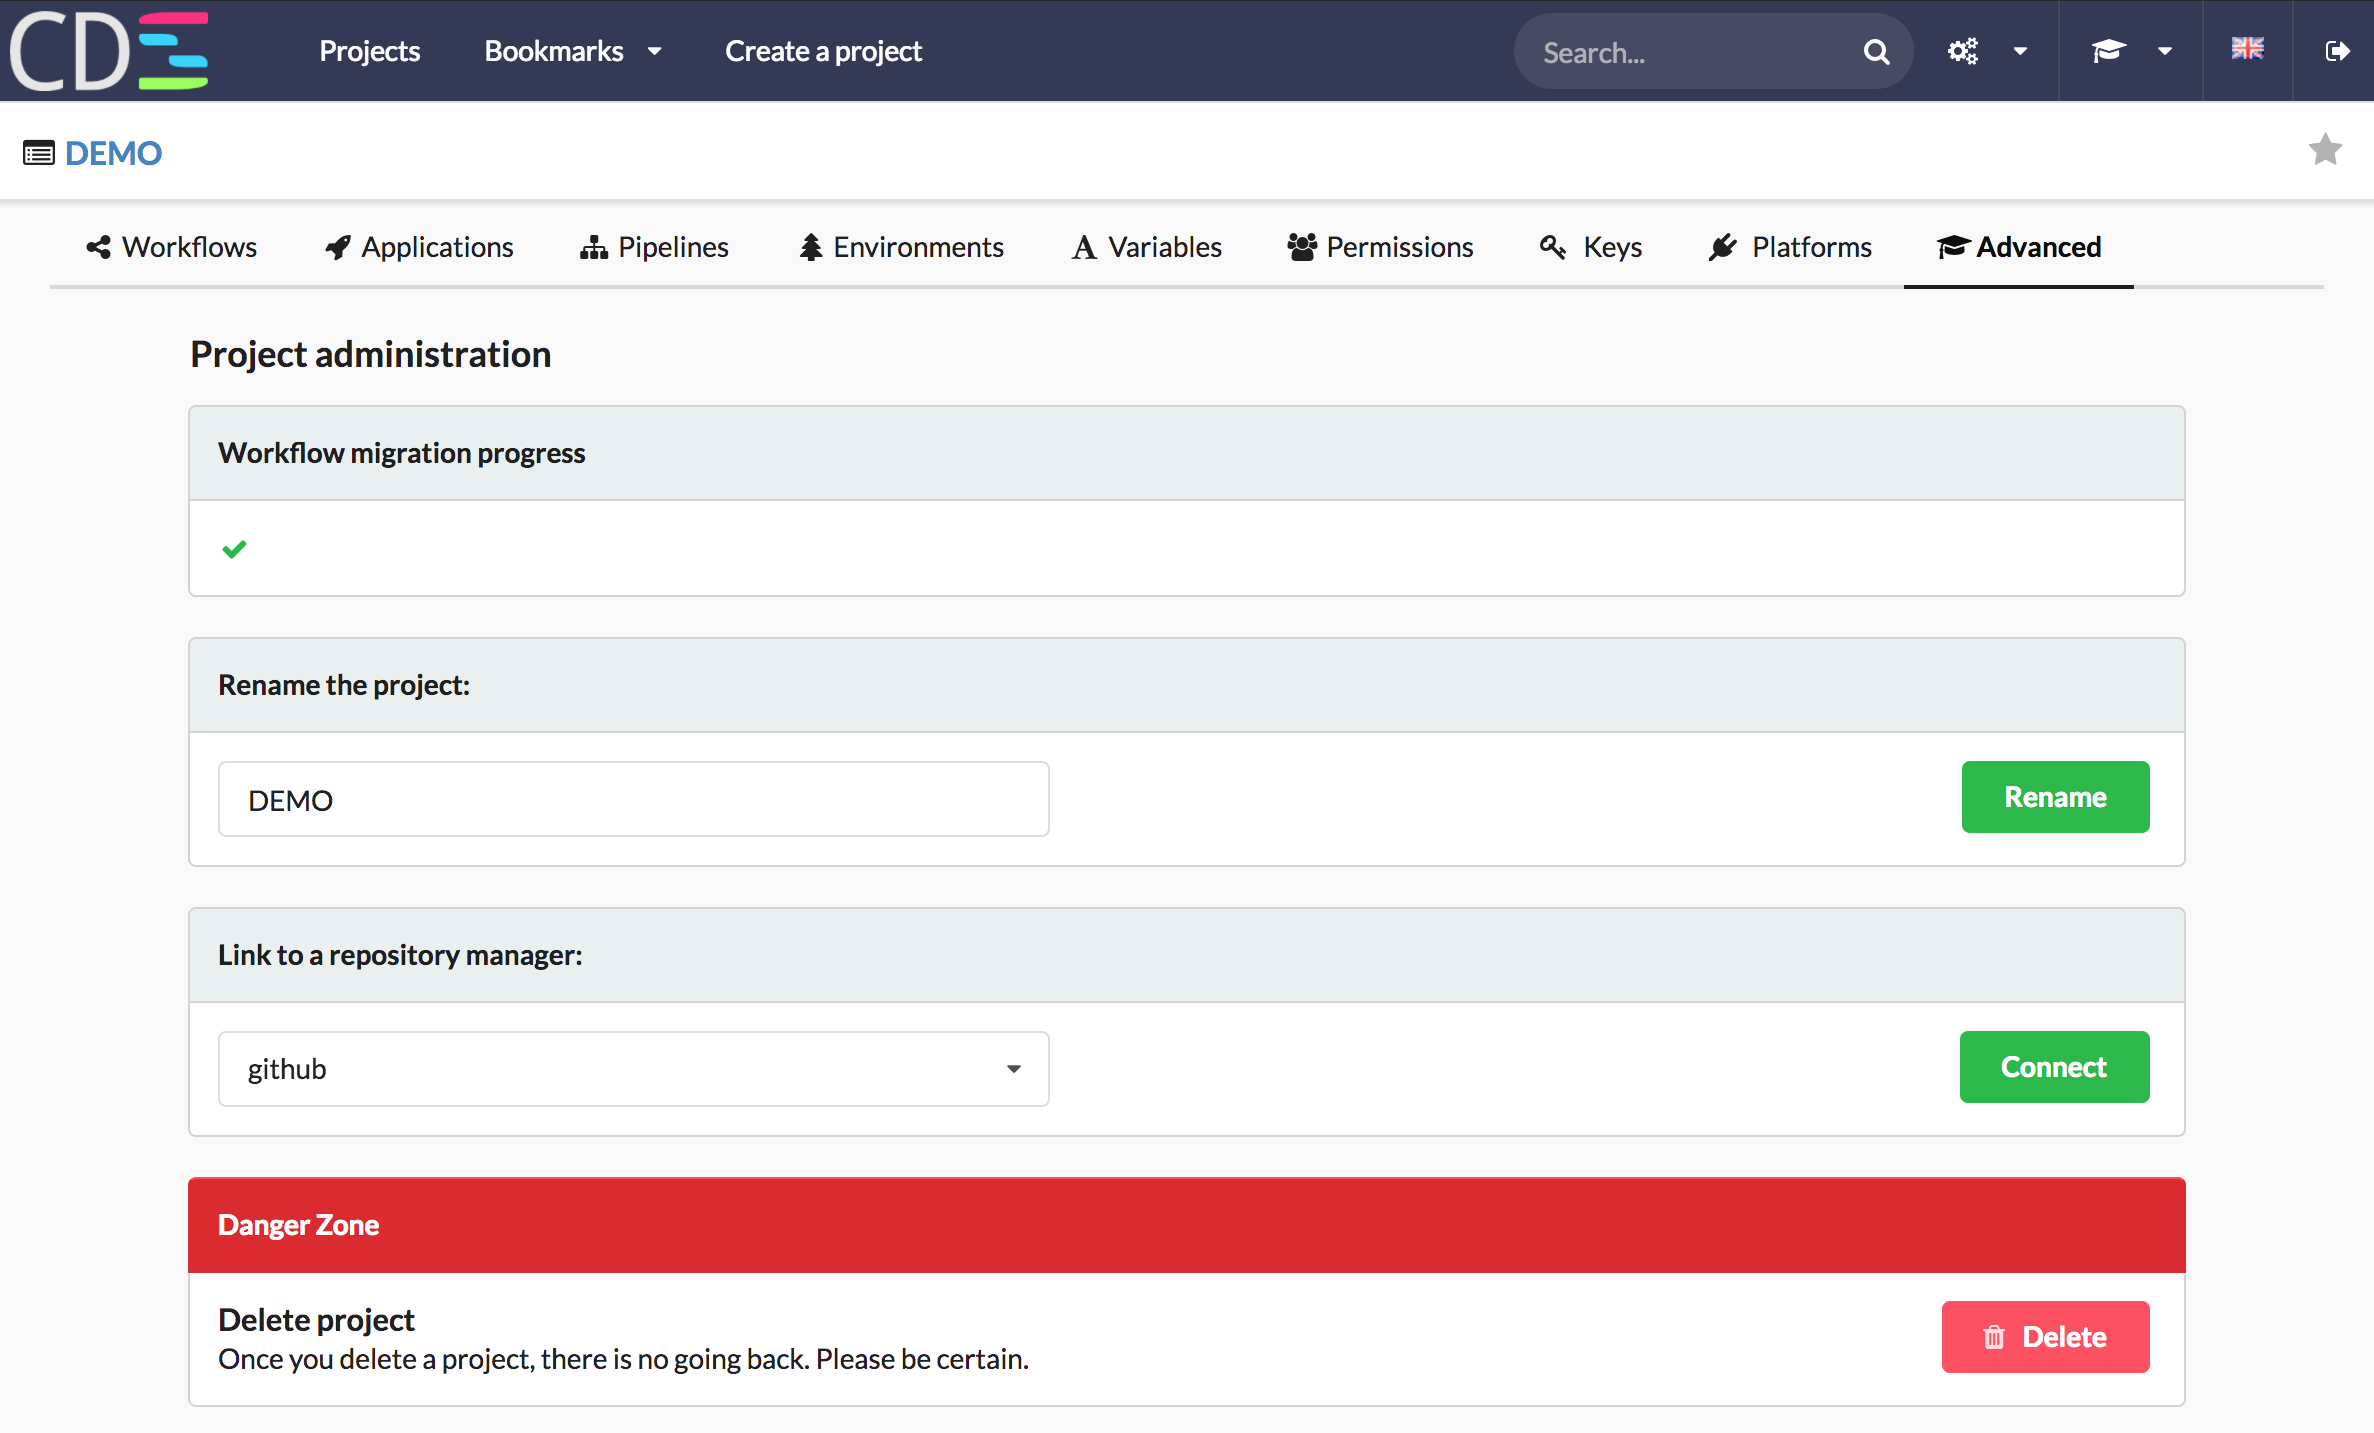
2 - Add a repository manager on your project
The project is now create, you have to link a repository manager. Be sure to have a Repository manager as GitHub, Bitbucket Server or GitLab set up on your CDS Instance.
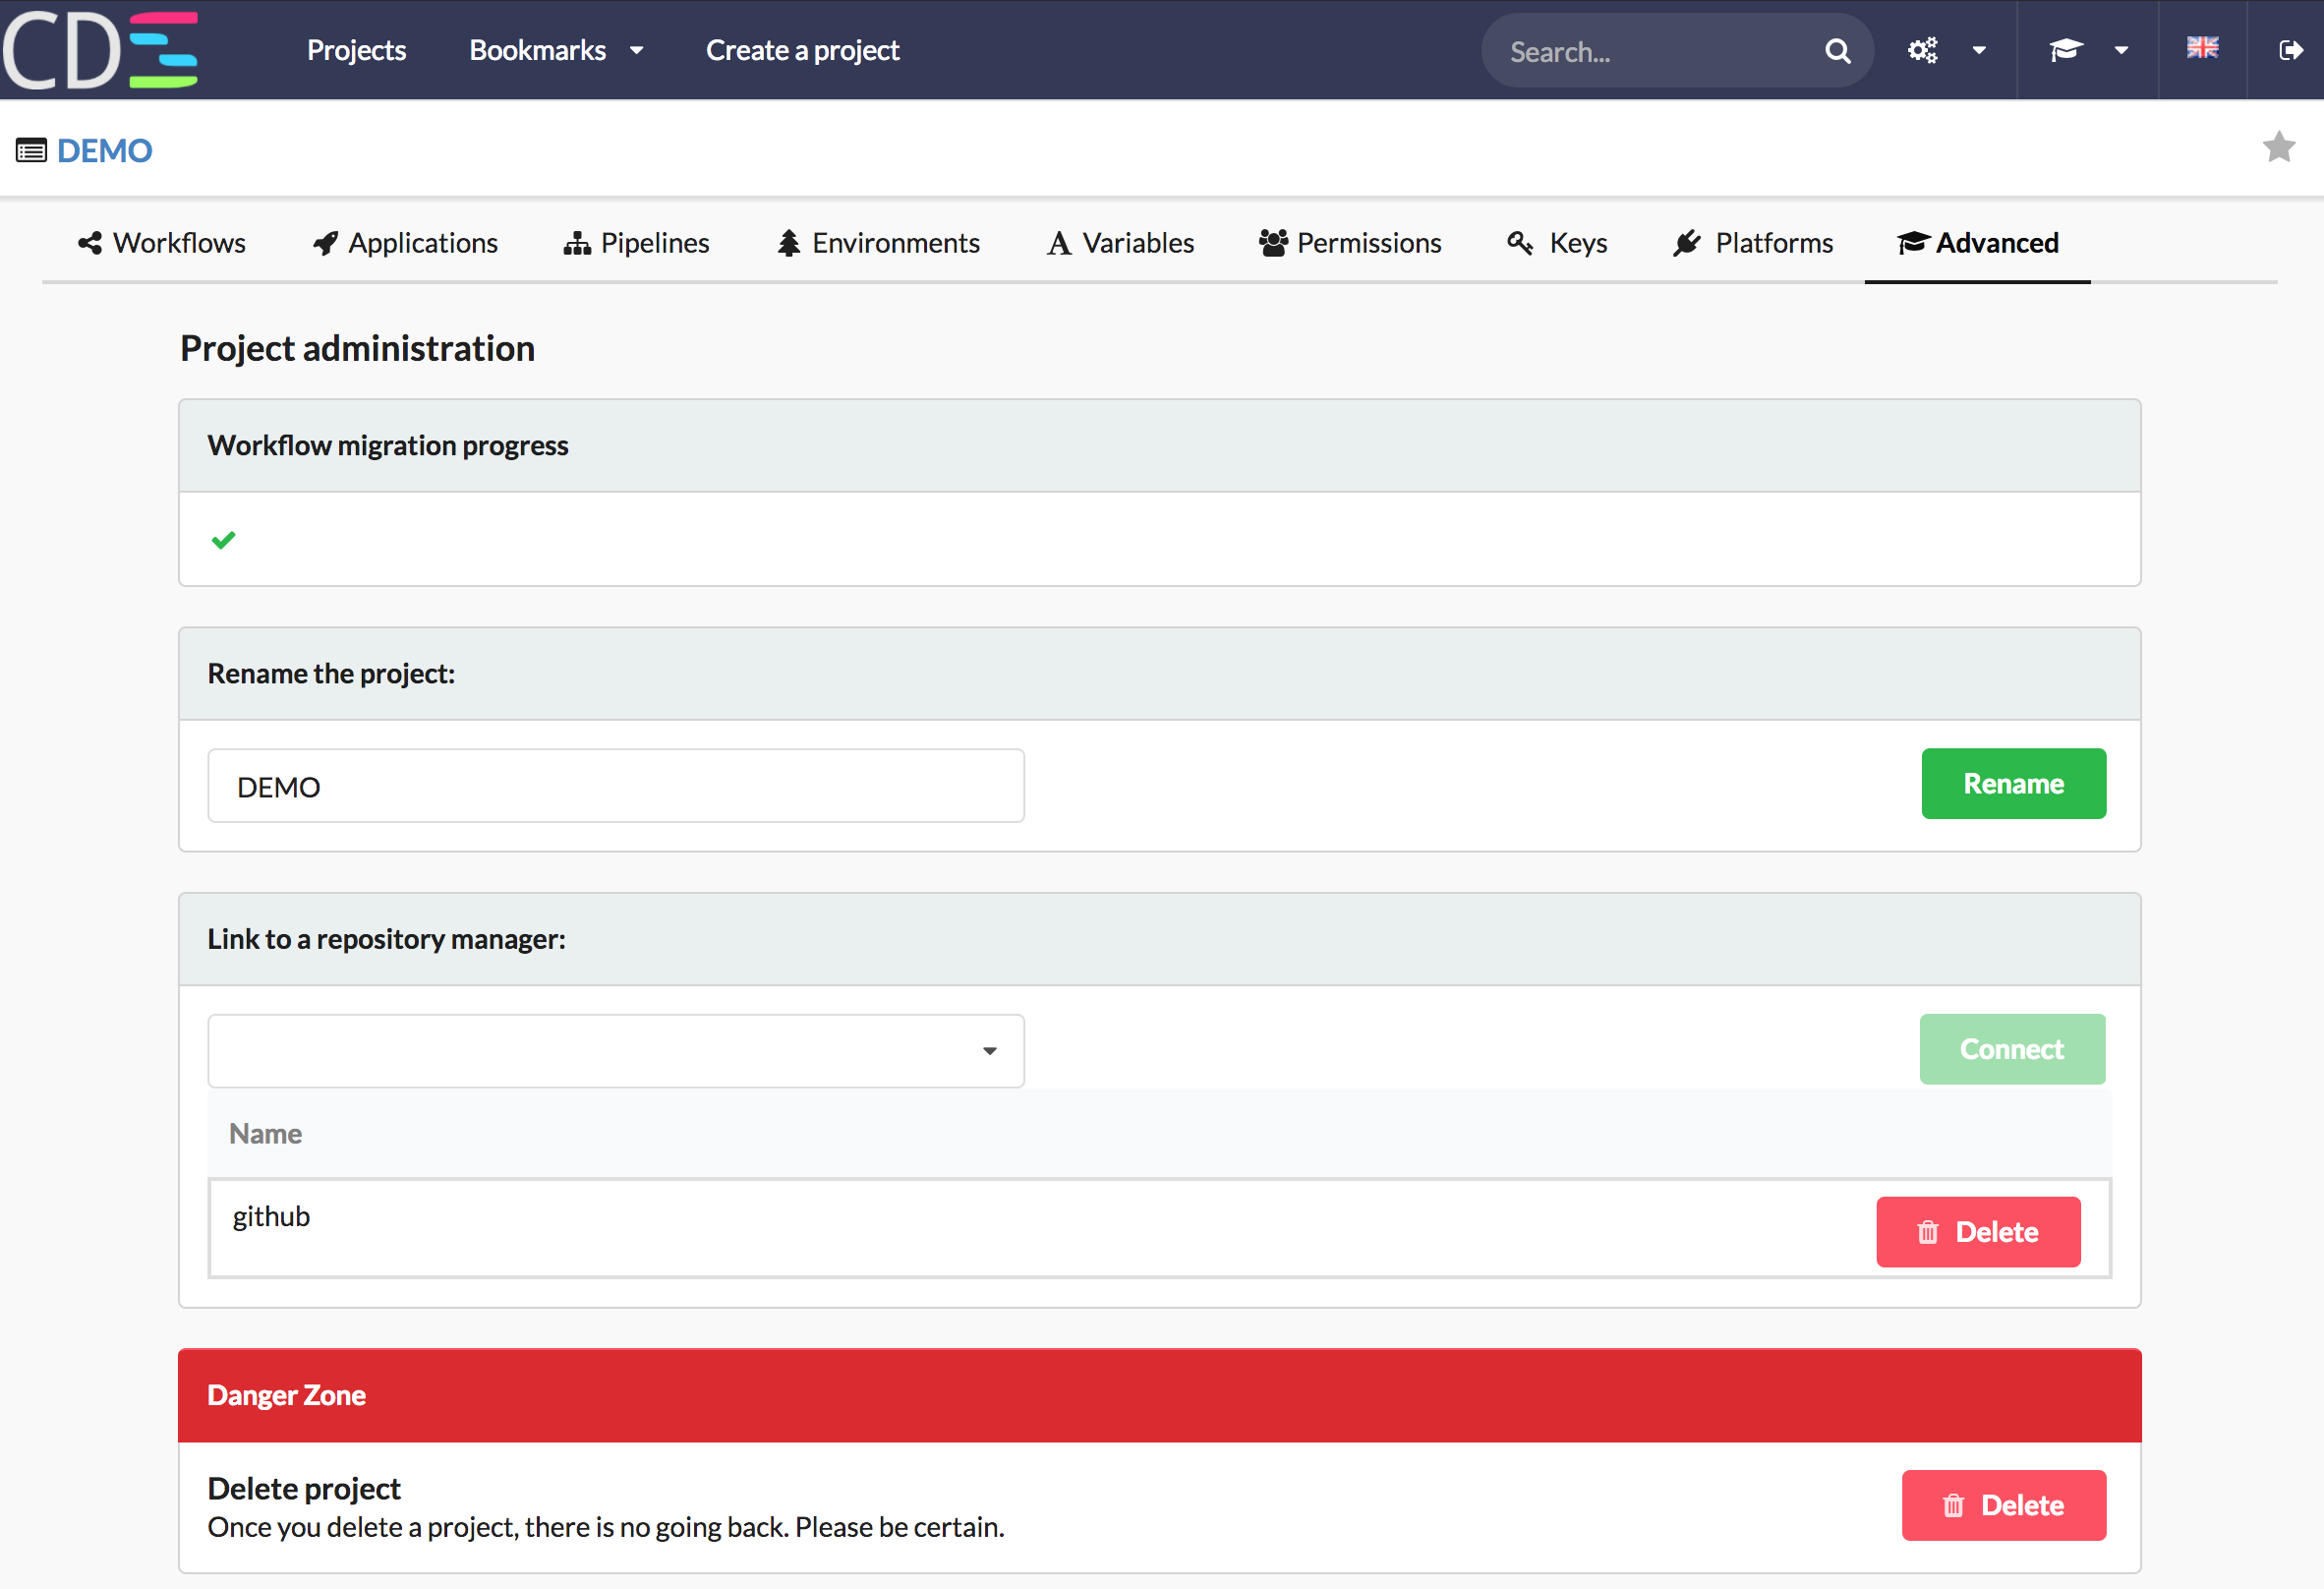
- Select ‘Advanced’ section
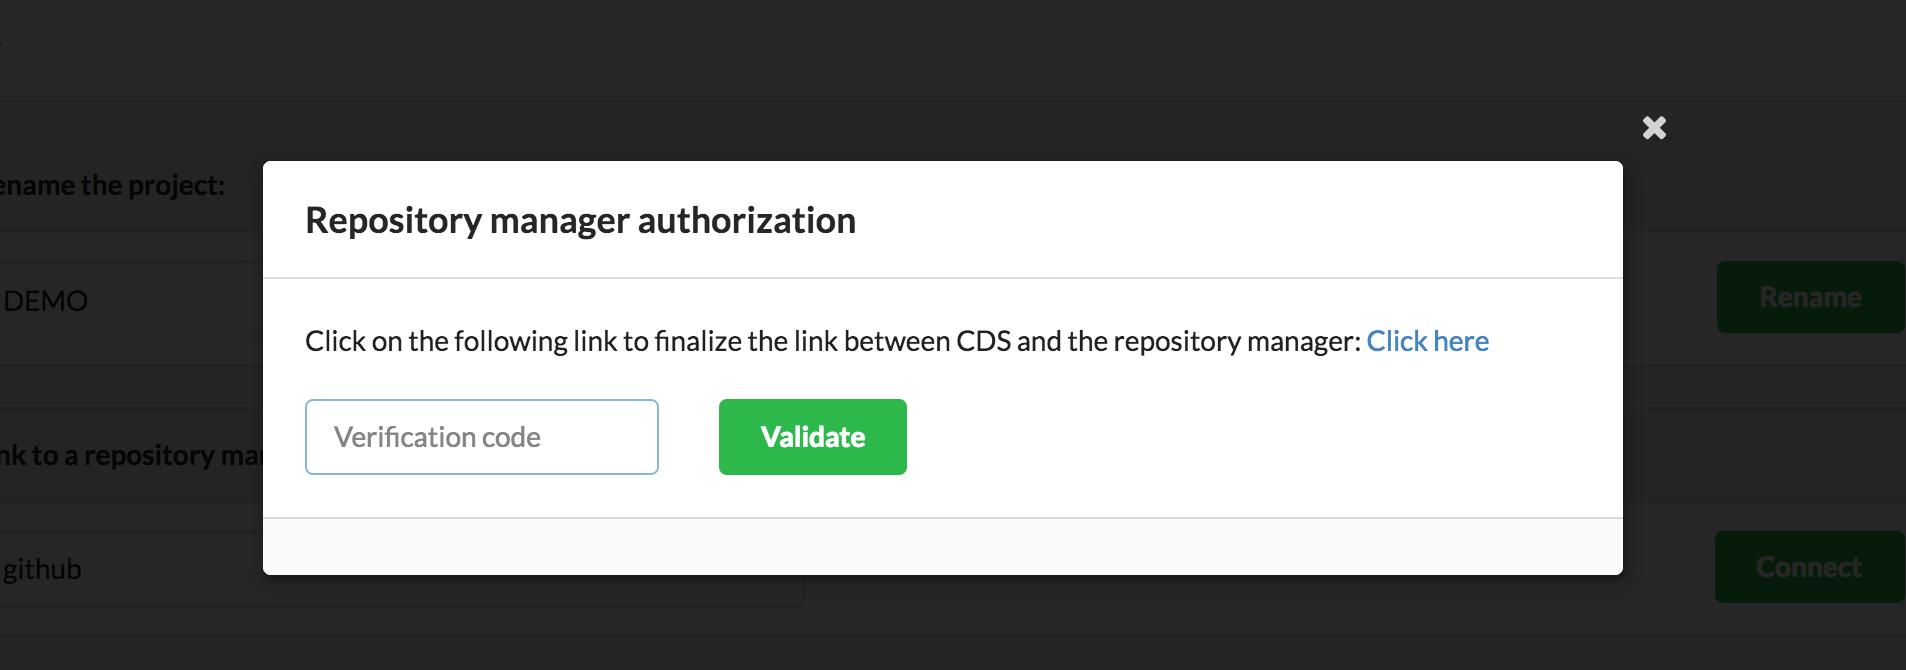
- In the section ‘Link to a repository manager’, select ‘github’, then click on ‘Connect’
- A popup is displayed, Click on ‘Click here’ to finalize the link with GitHub. By doing that, you allow CDS to create hook on GitHub.
3 - Create an application, link it to a Git Repository
You’ve got a project, linked to GitHub. Let’s create an application.
A CDS Application is useful to have a link to a Git Repository.
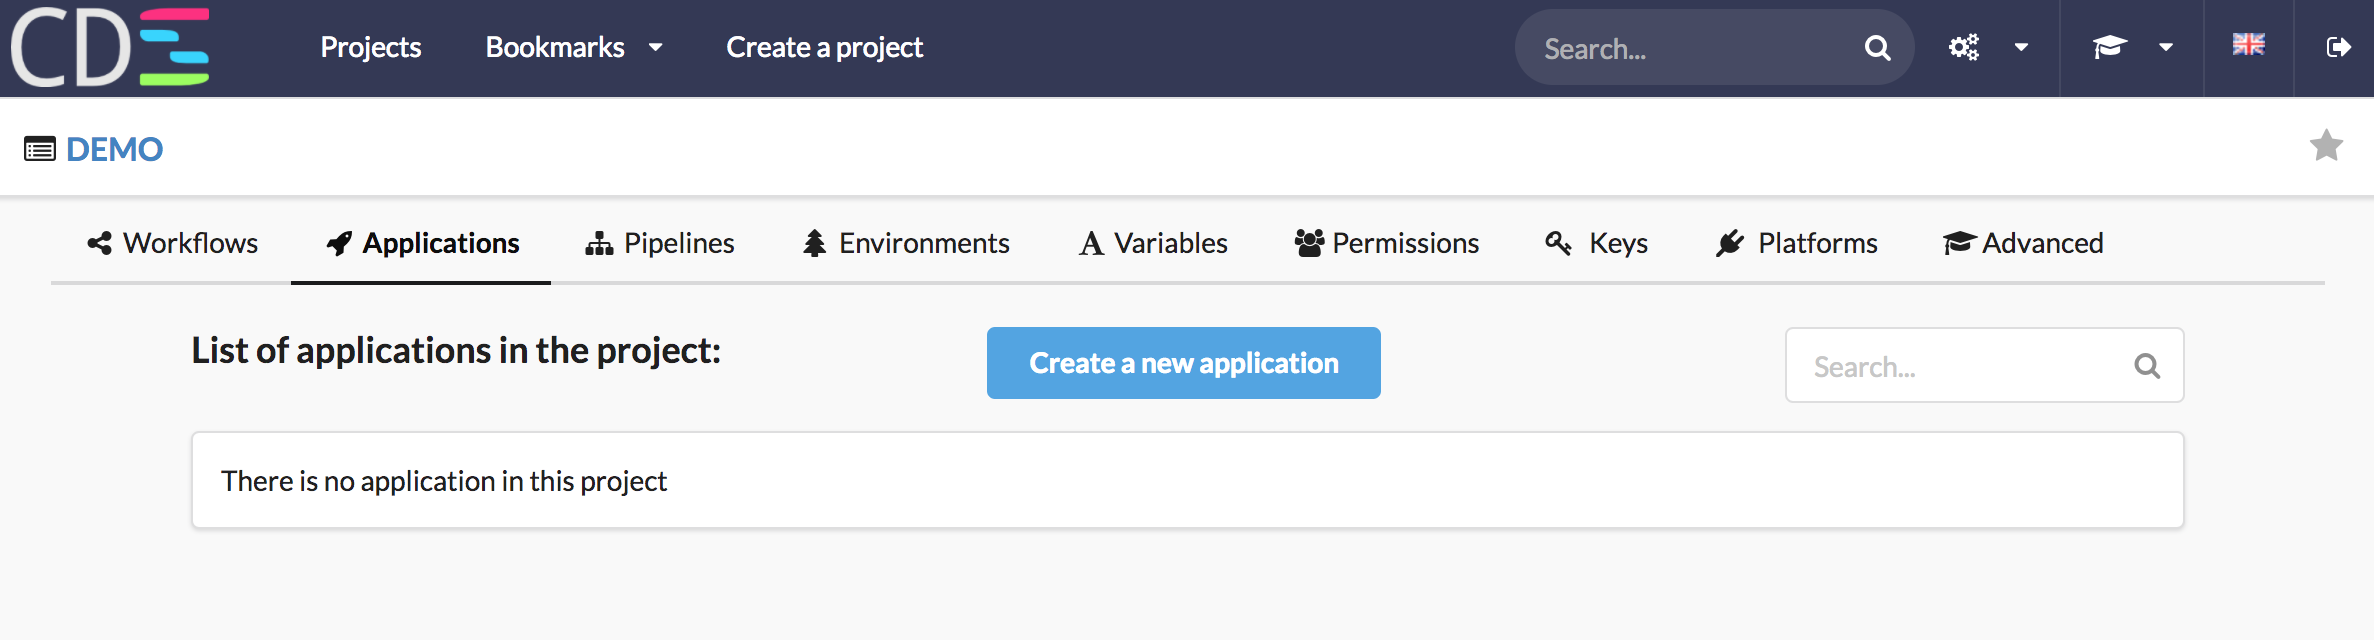
- Go on Project -> Applications tab, click on ‘Create a new application’
- Enter application name, here ‘my-java-app’
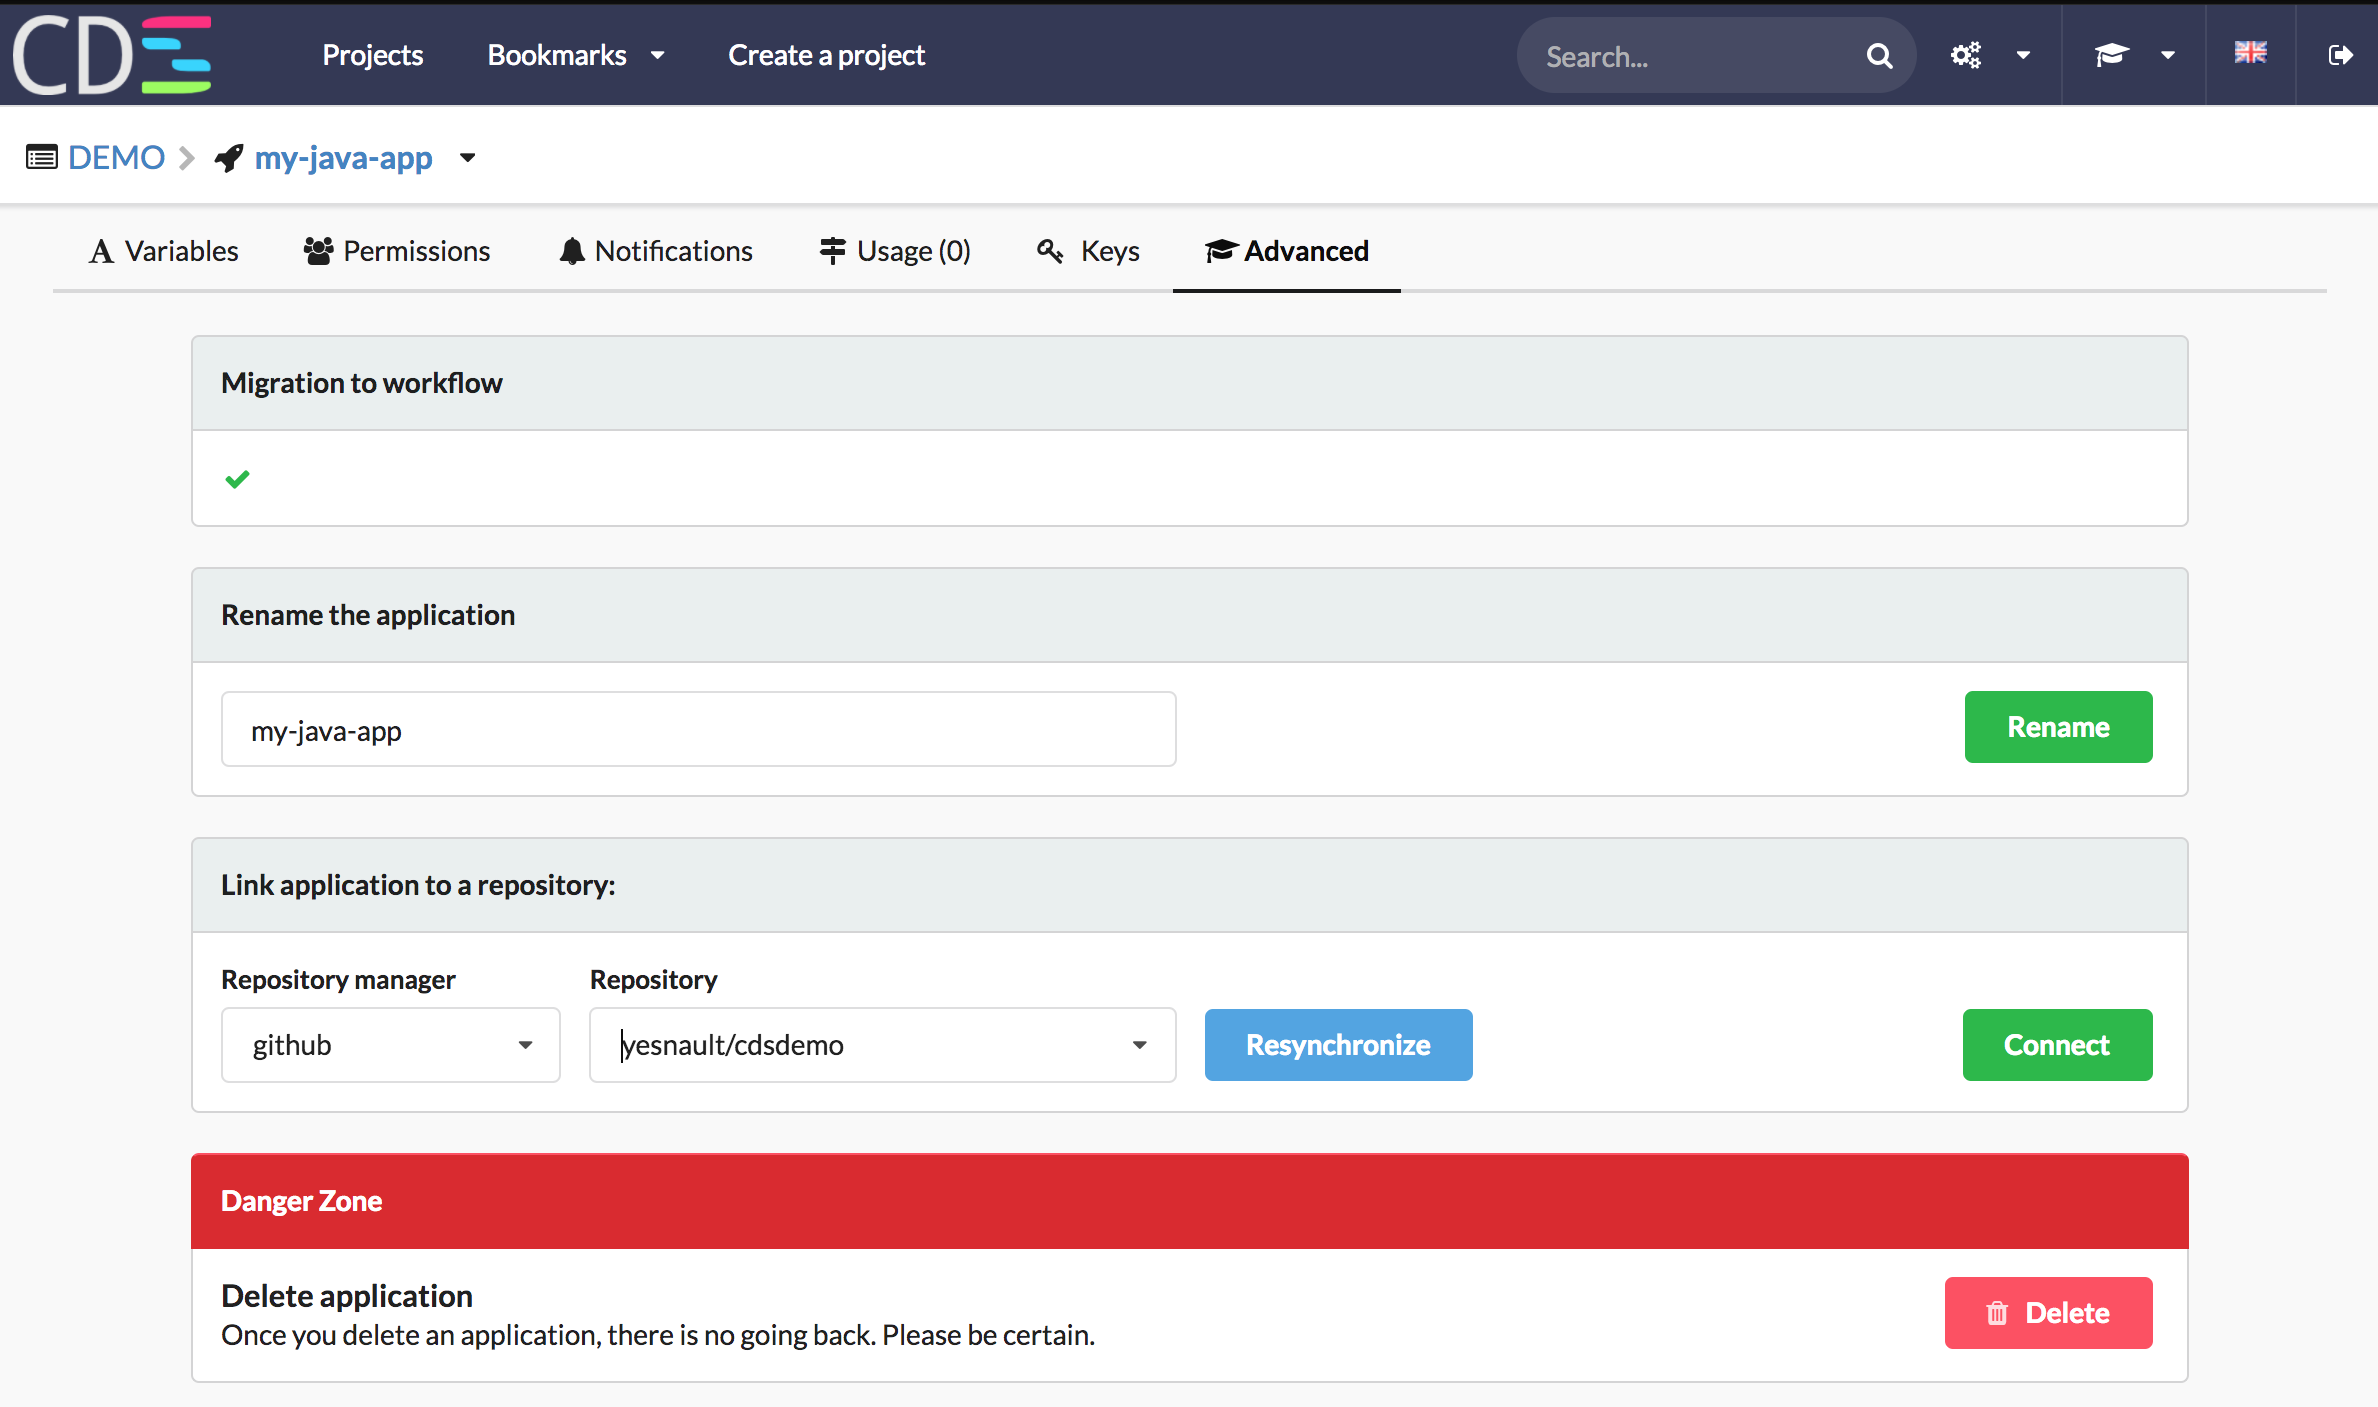
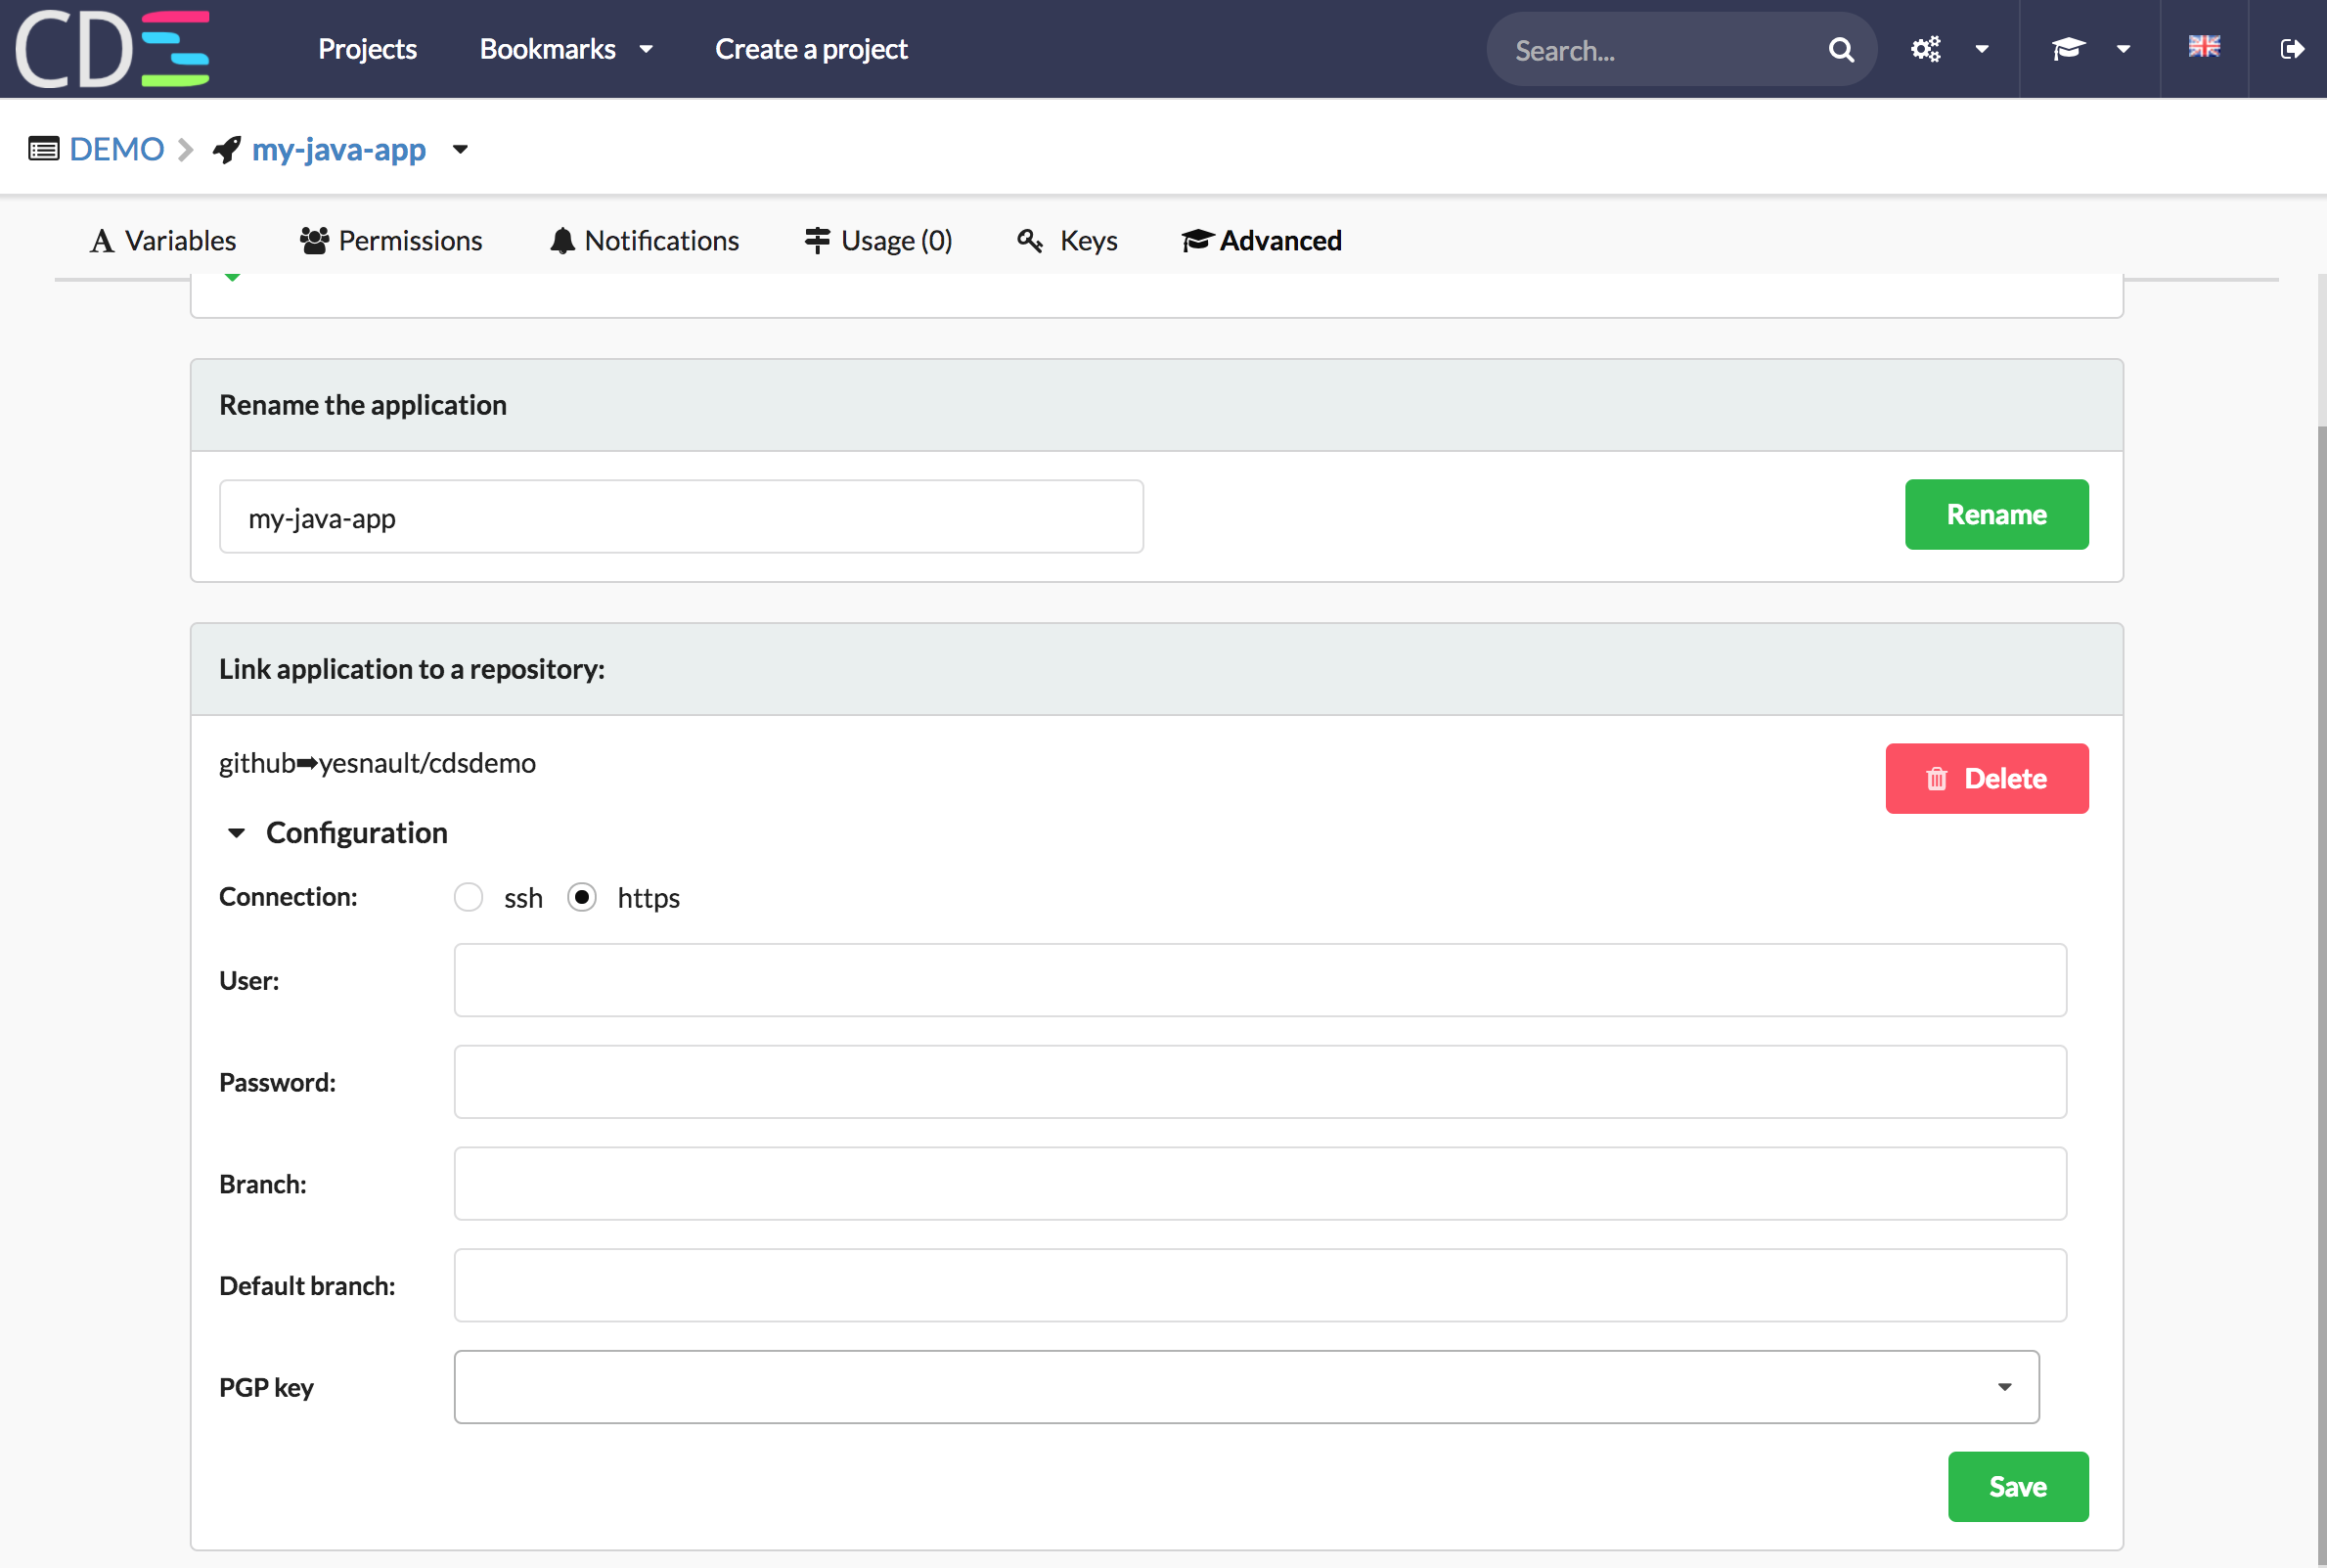
- Go on Advanced tab, select a Repository
- Expand configuration, select ‘https’. If your repository is public, you can keep empty fields, then click on ‘Save’

4 - Generate a GitHub Token
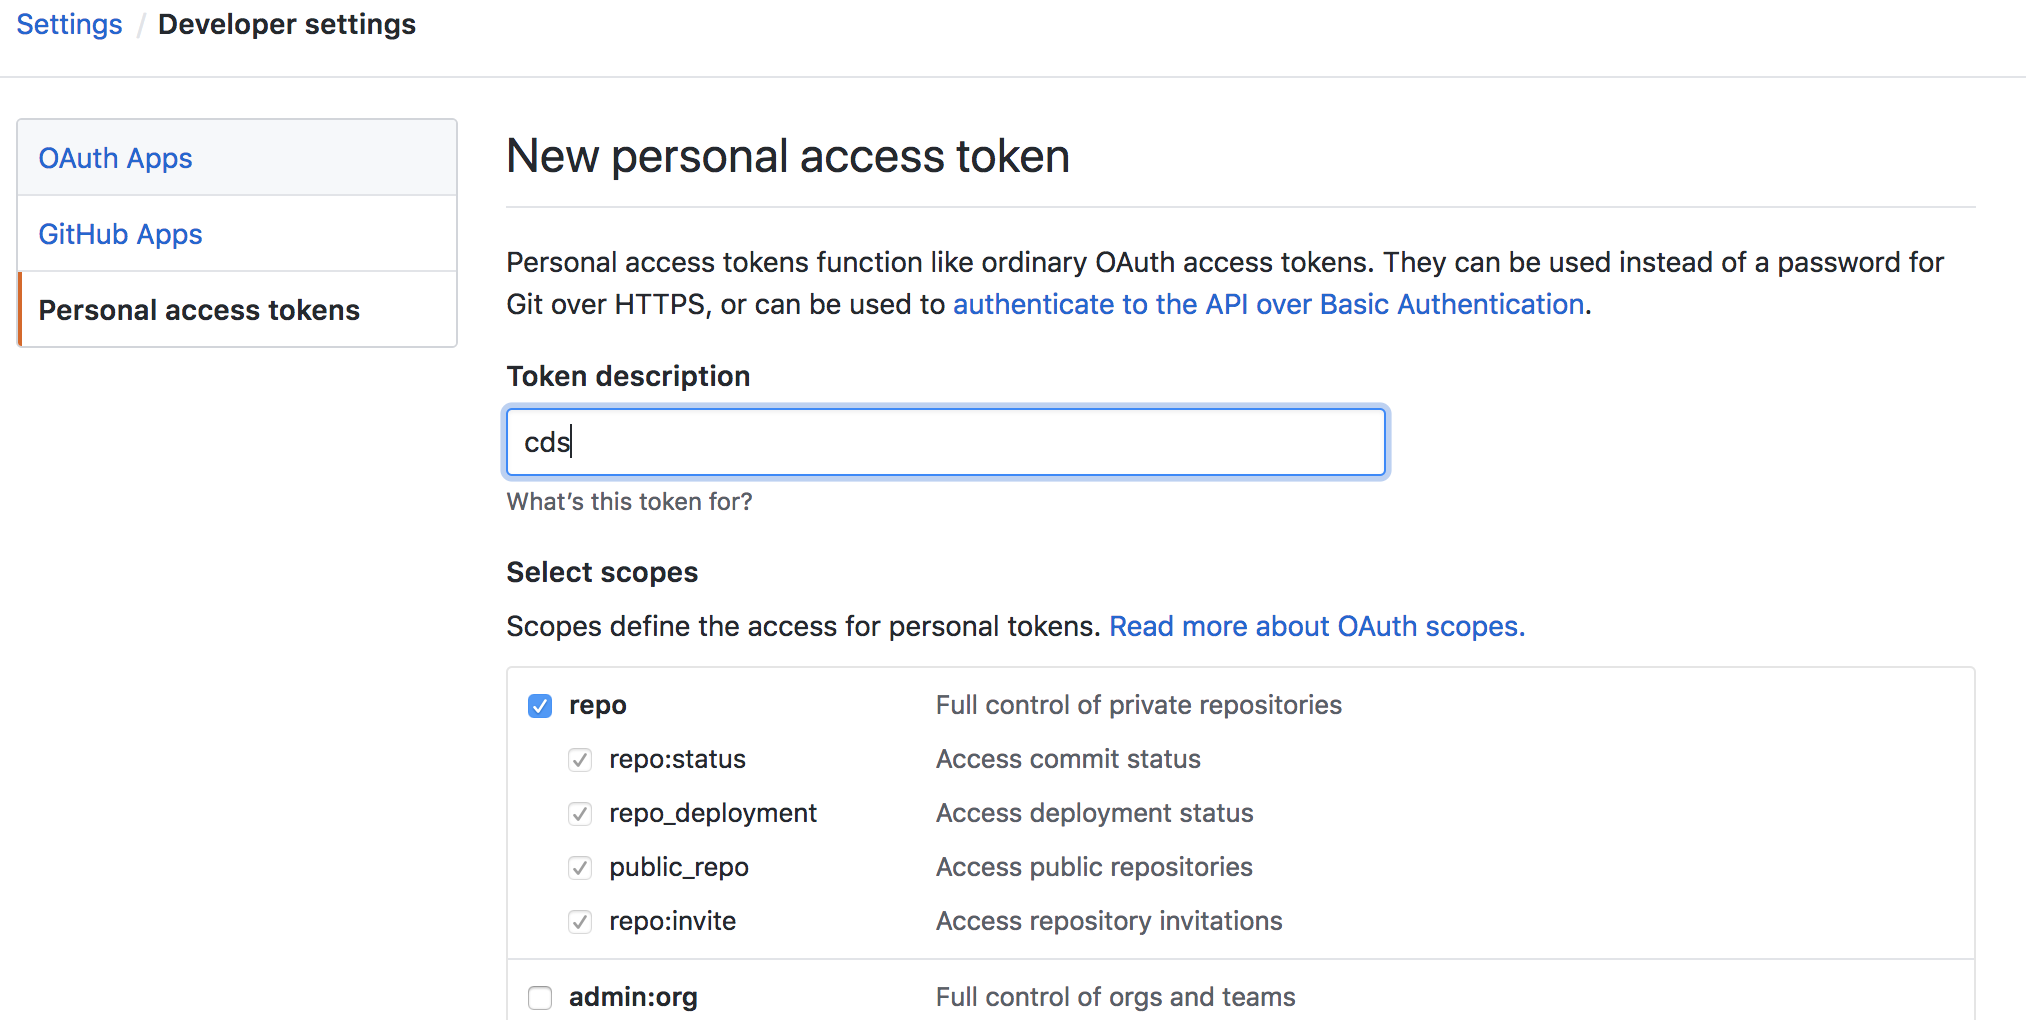
This token will be used to let CDS create a tag.
- Go on https://github.com/settings/tokens/new, enter a description. Example ‘cds-demo’, click on Generate Token.
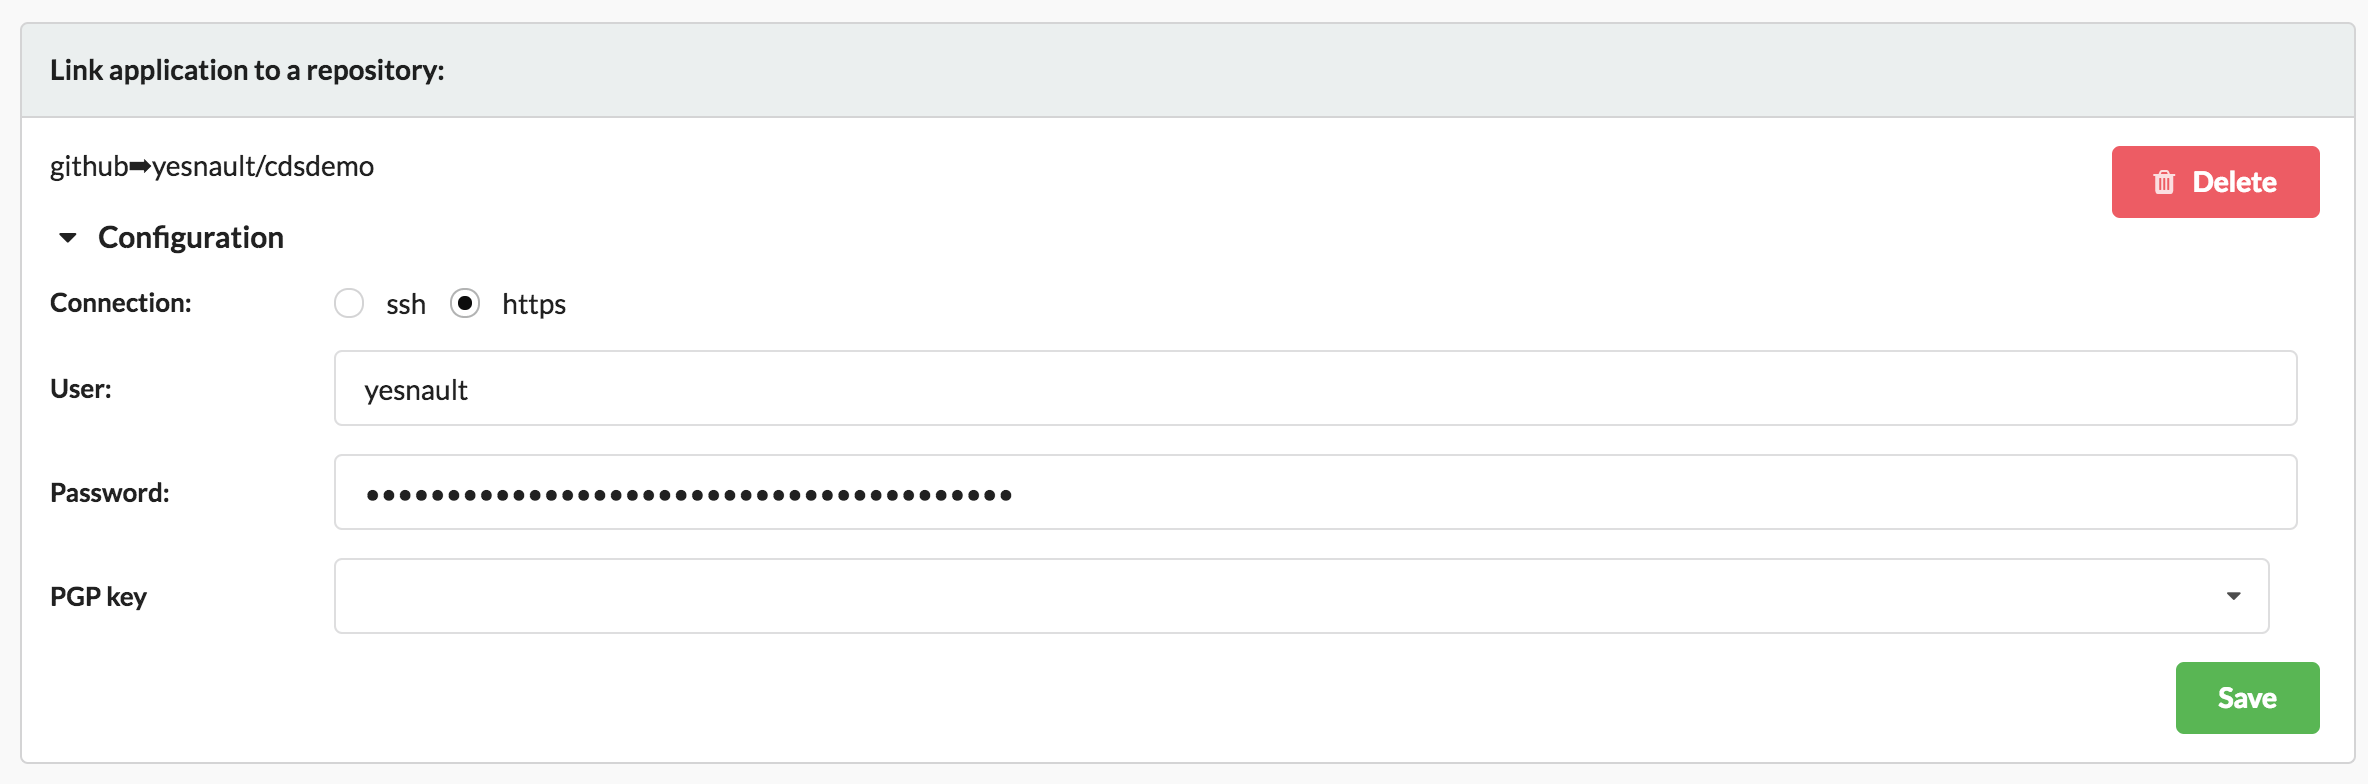
- Go on CDS, select your application and put the token in field password
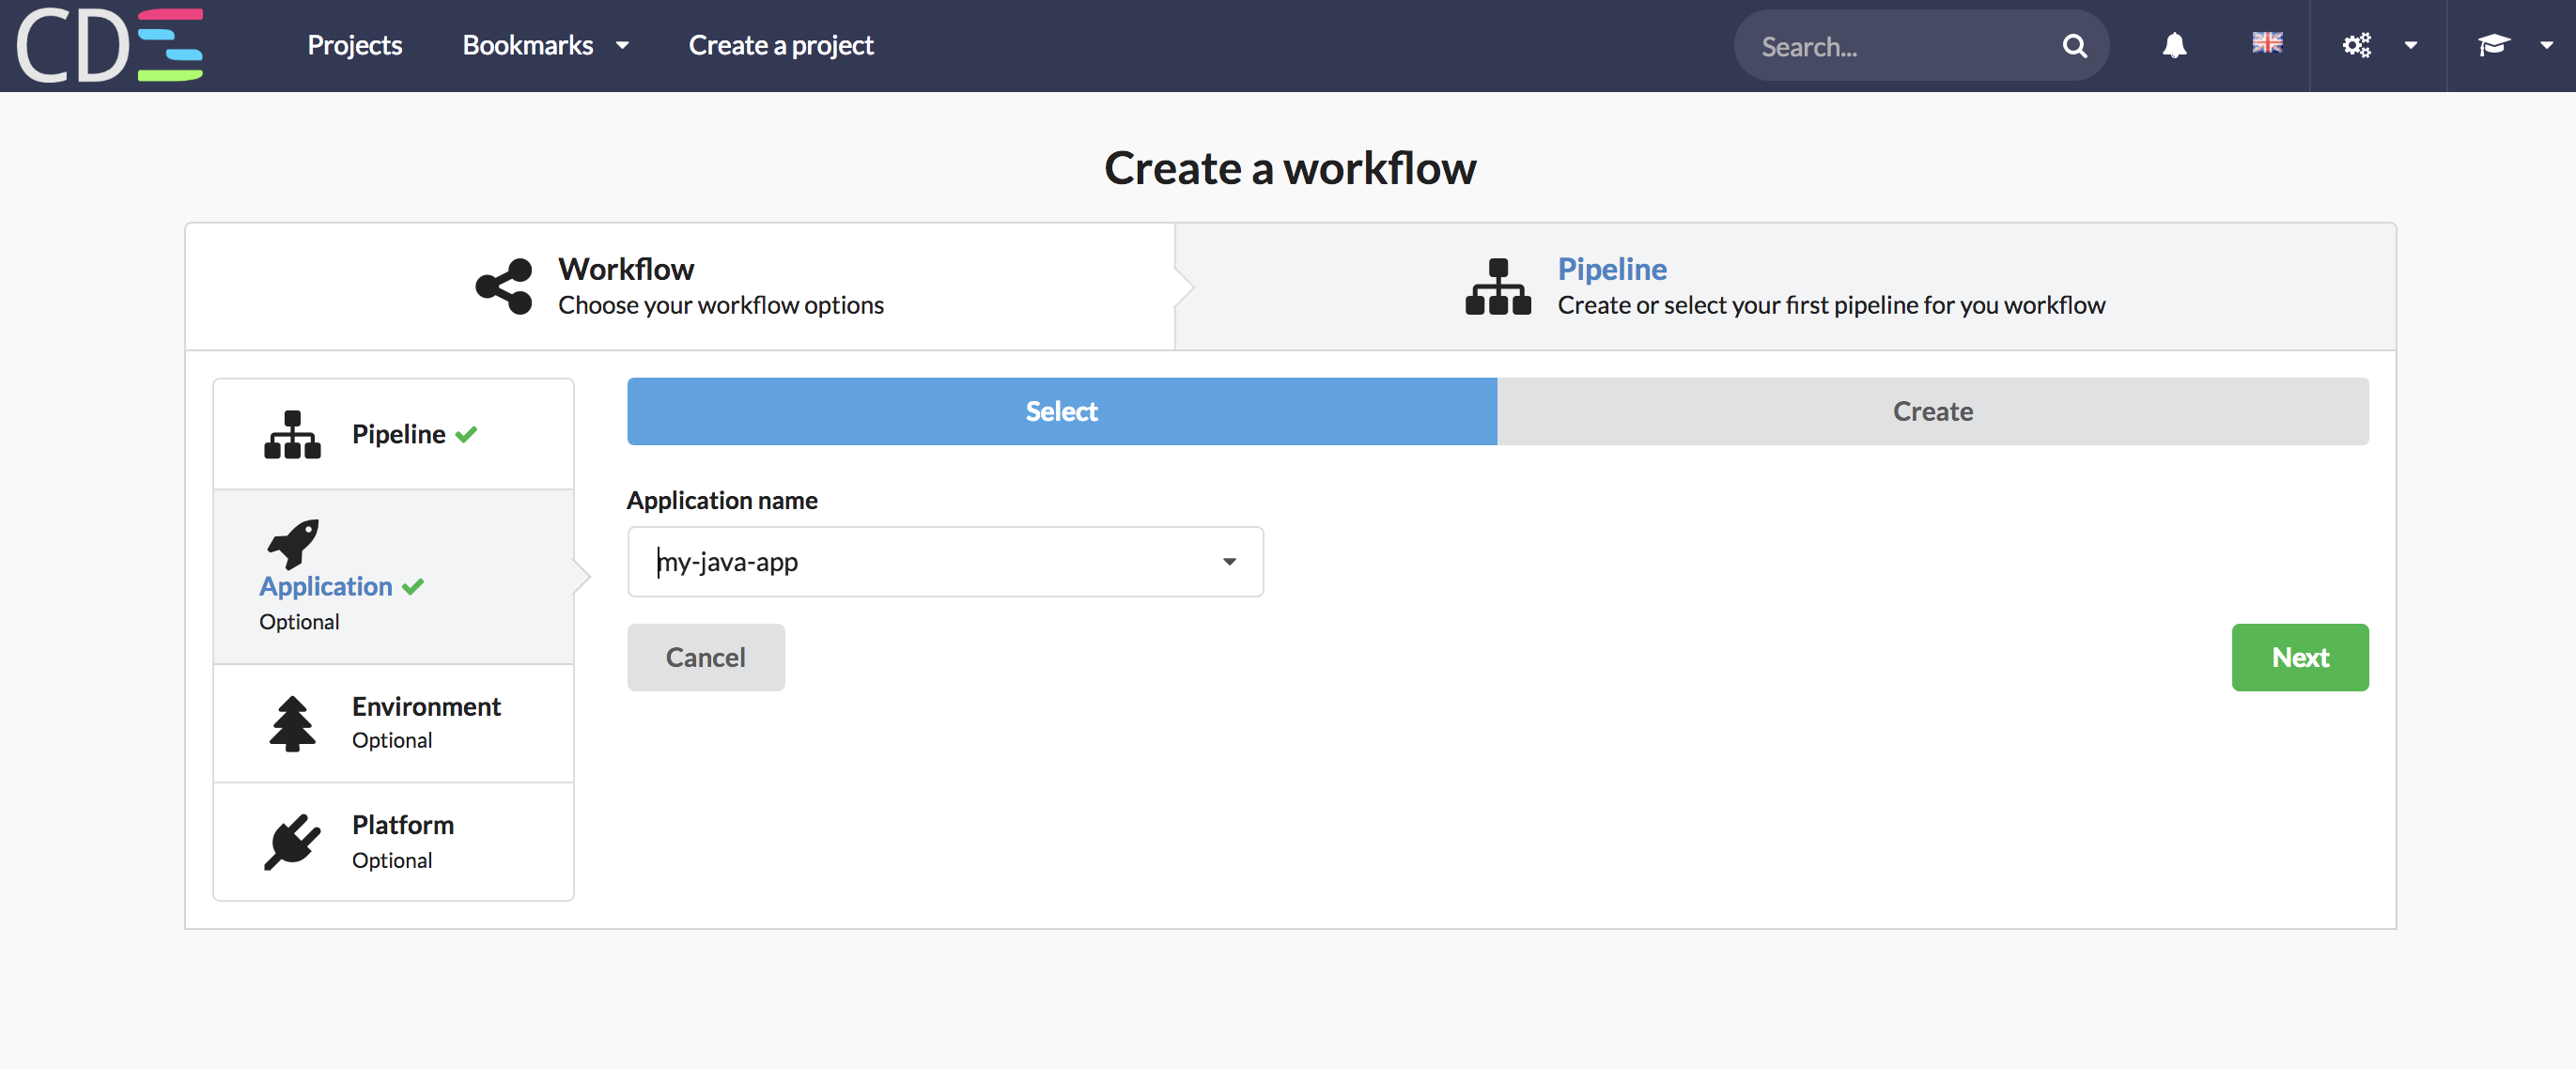
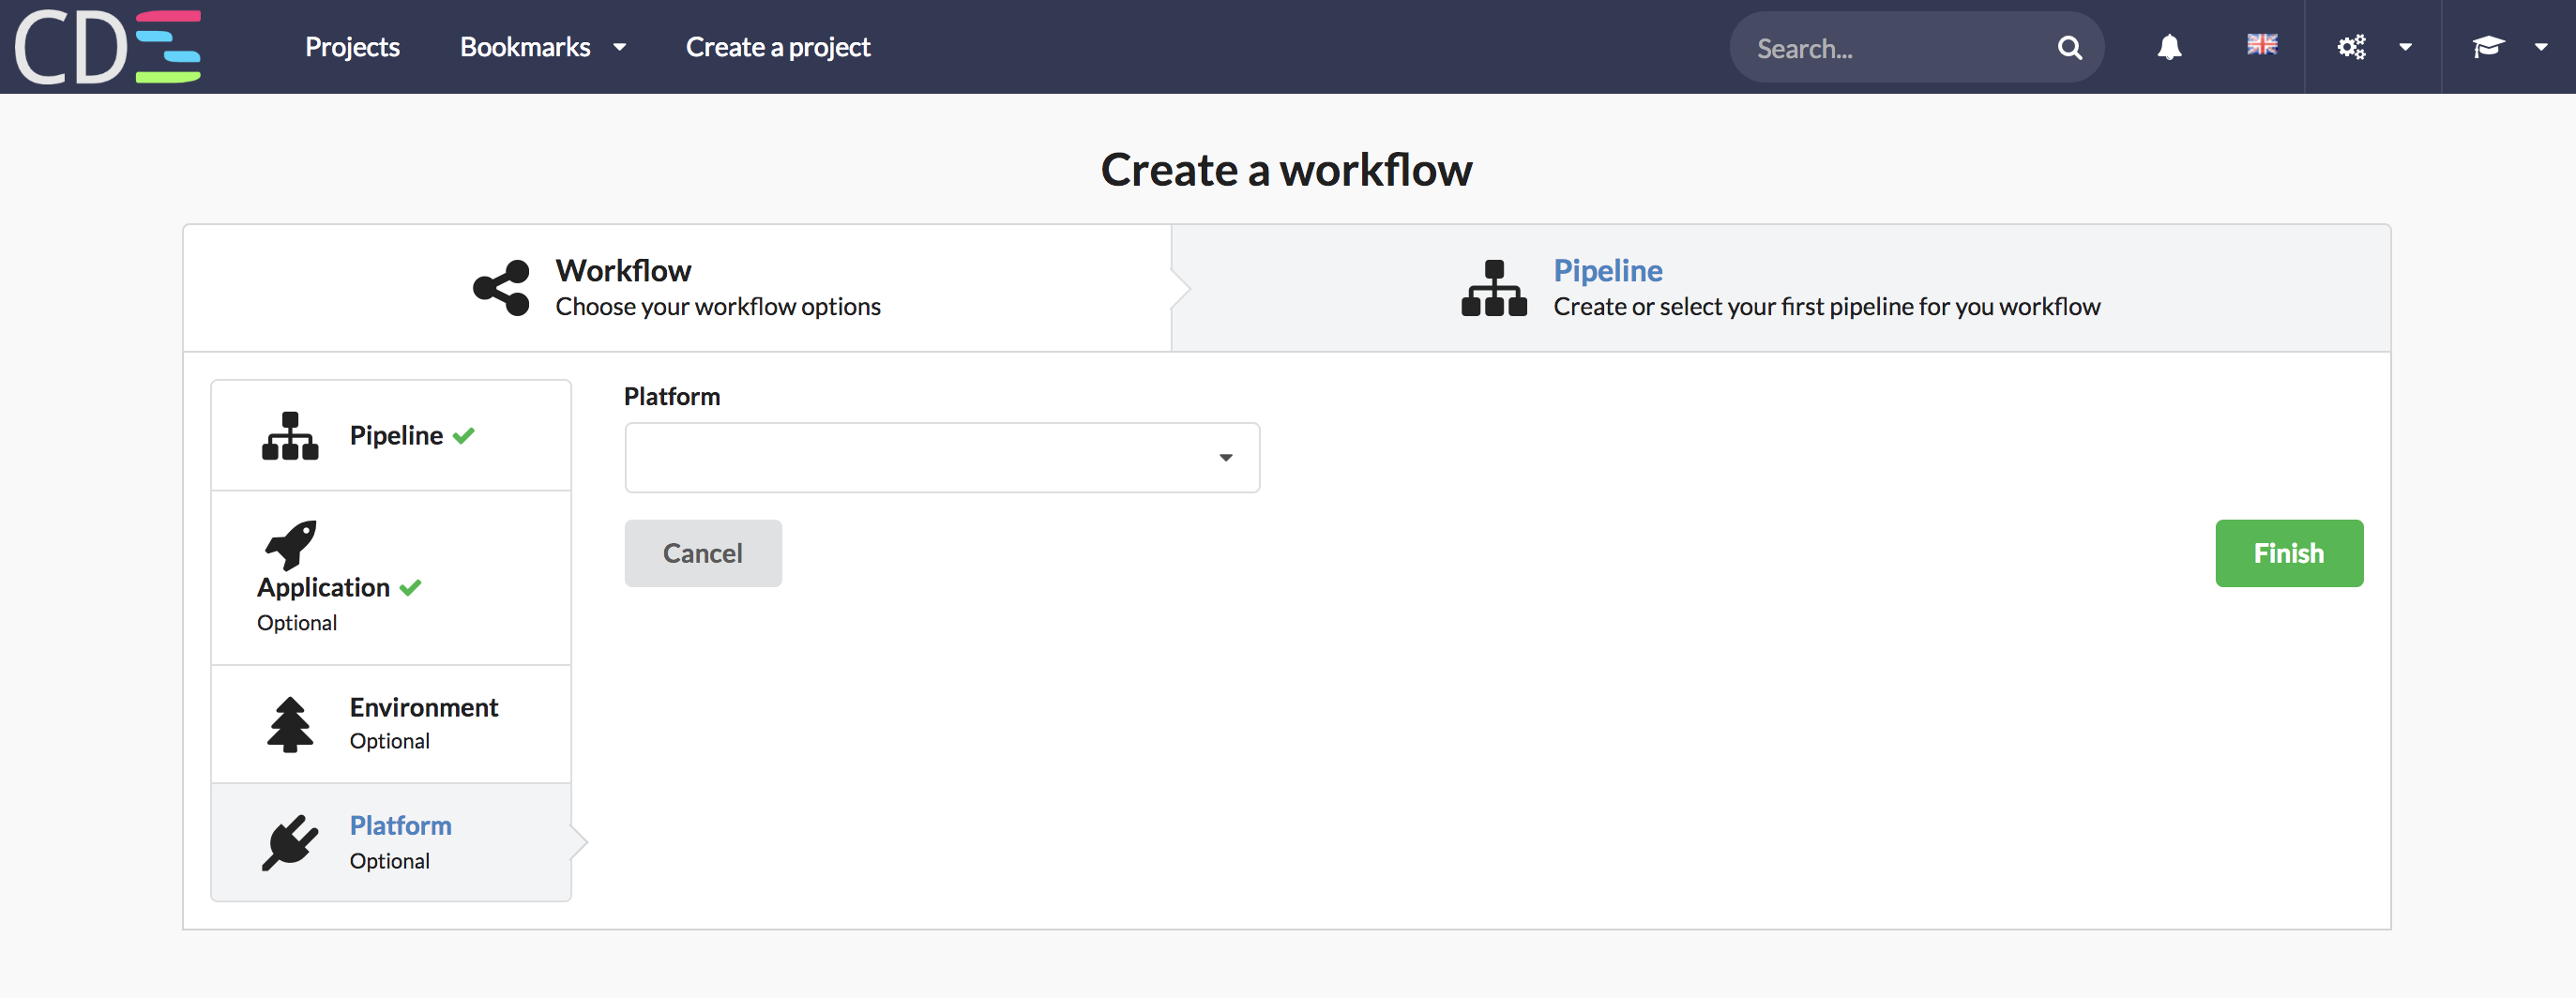
5 - Create the workflow
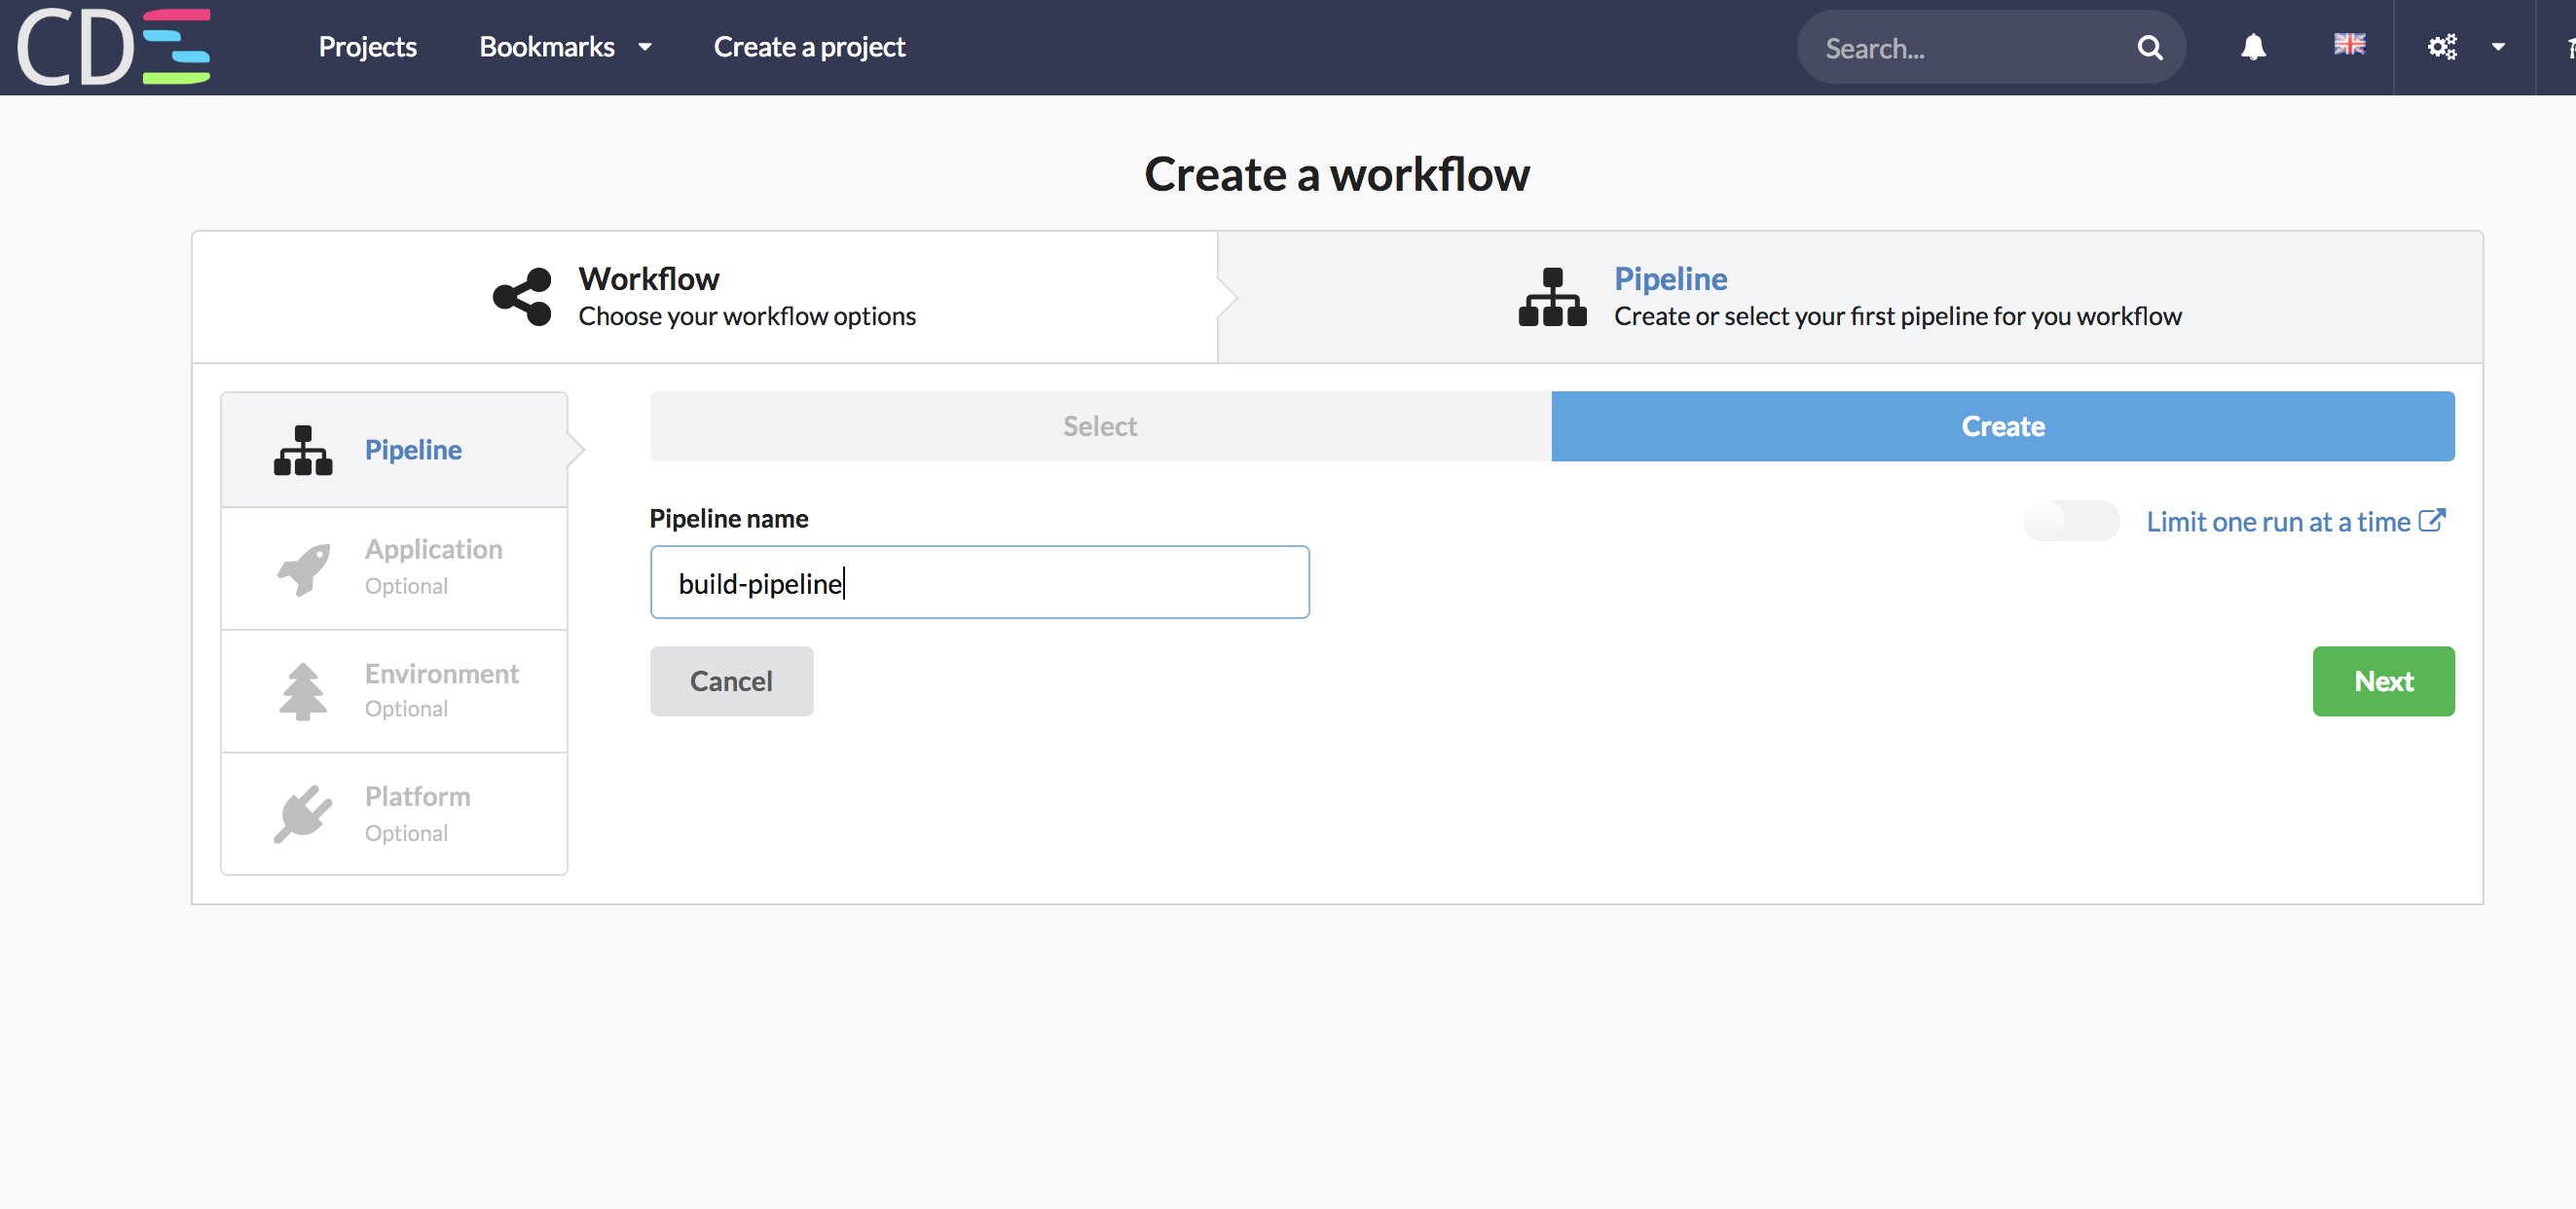
- Go to Project -> Workflows tab
- Enter the Workflow name, then click on Next
- You have now to choose the first pipeline. As you don’t have a pipeline yet, you will create a new one, named ‘build-pipeline’. Click on Next
- Now, you have to select an application. Choose your application ‘my-java-app’, then click on Next
- We don’t need an environment, neither platform for the build pipeline, Click on ‘Finish’
Notice: the build pipeline does nothing here. You can add some job inside it, please read this tutorial to create a ‘build’ pipeline.
6 - Add a Hook on your workflow
In this example, we create a Workflow to build, tag and release an application.
So, we have to trigger this workflow on each commit, on every git branches - and on each tag created. This will be useful to compile code from all developer and sometimes create a tag from master branch if the build is Success.
The application is linked to a GitHub Git Repository, we have two choices to trigger automatically the workflow:
- add a Git Repository Webhook
- or add a Git Repository Poller.
The difference between both is simple: a Git Repository Webhook does not work if your CDS Instance is not reachable from GitHub. So, we have to add a Git Repository Poller
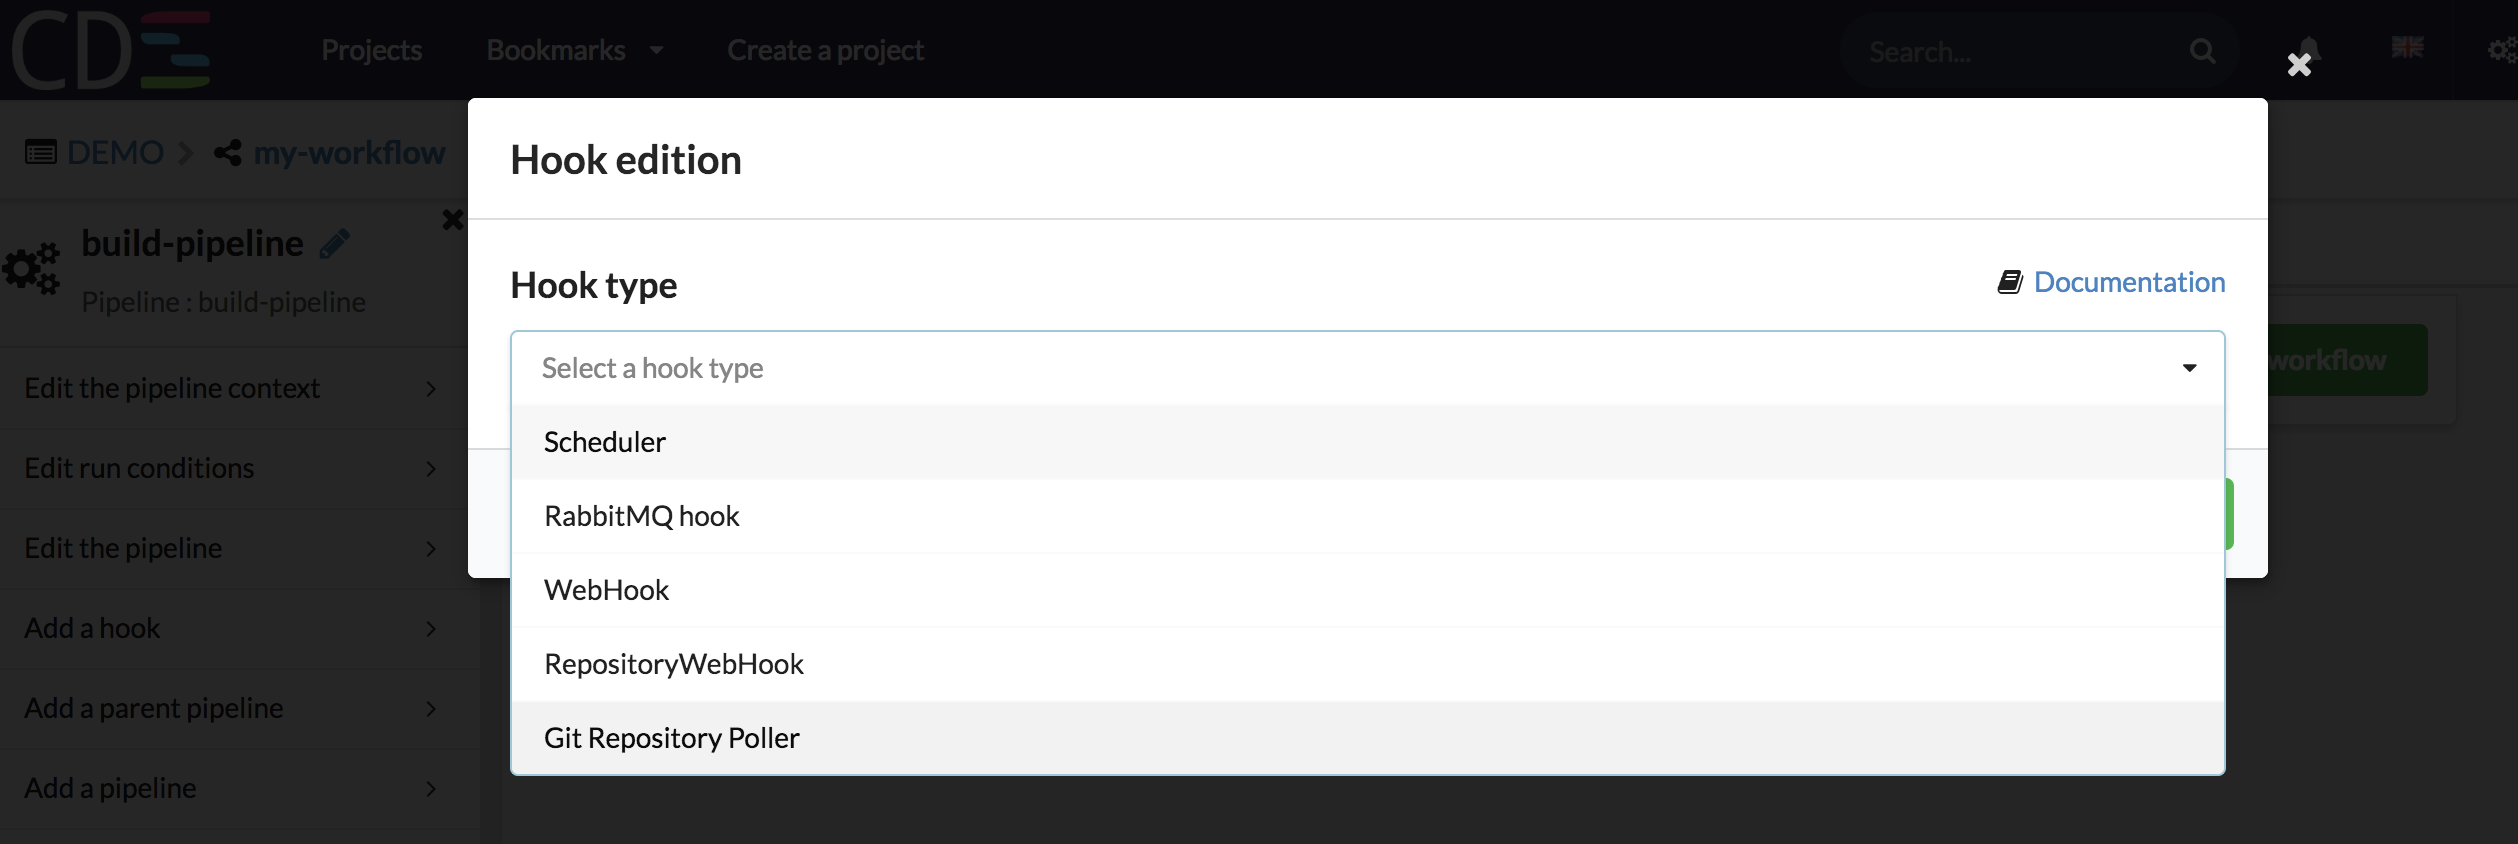
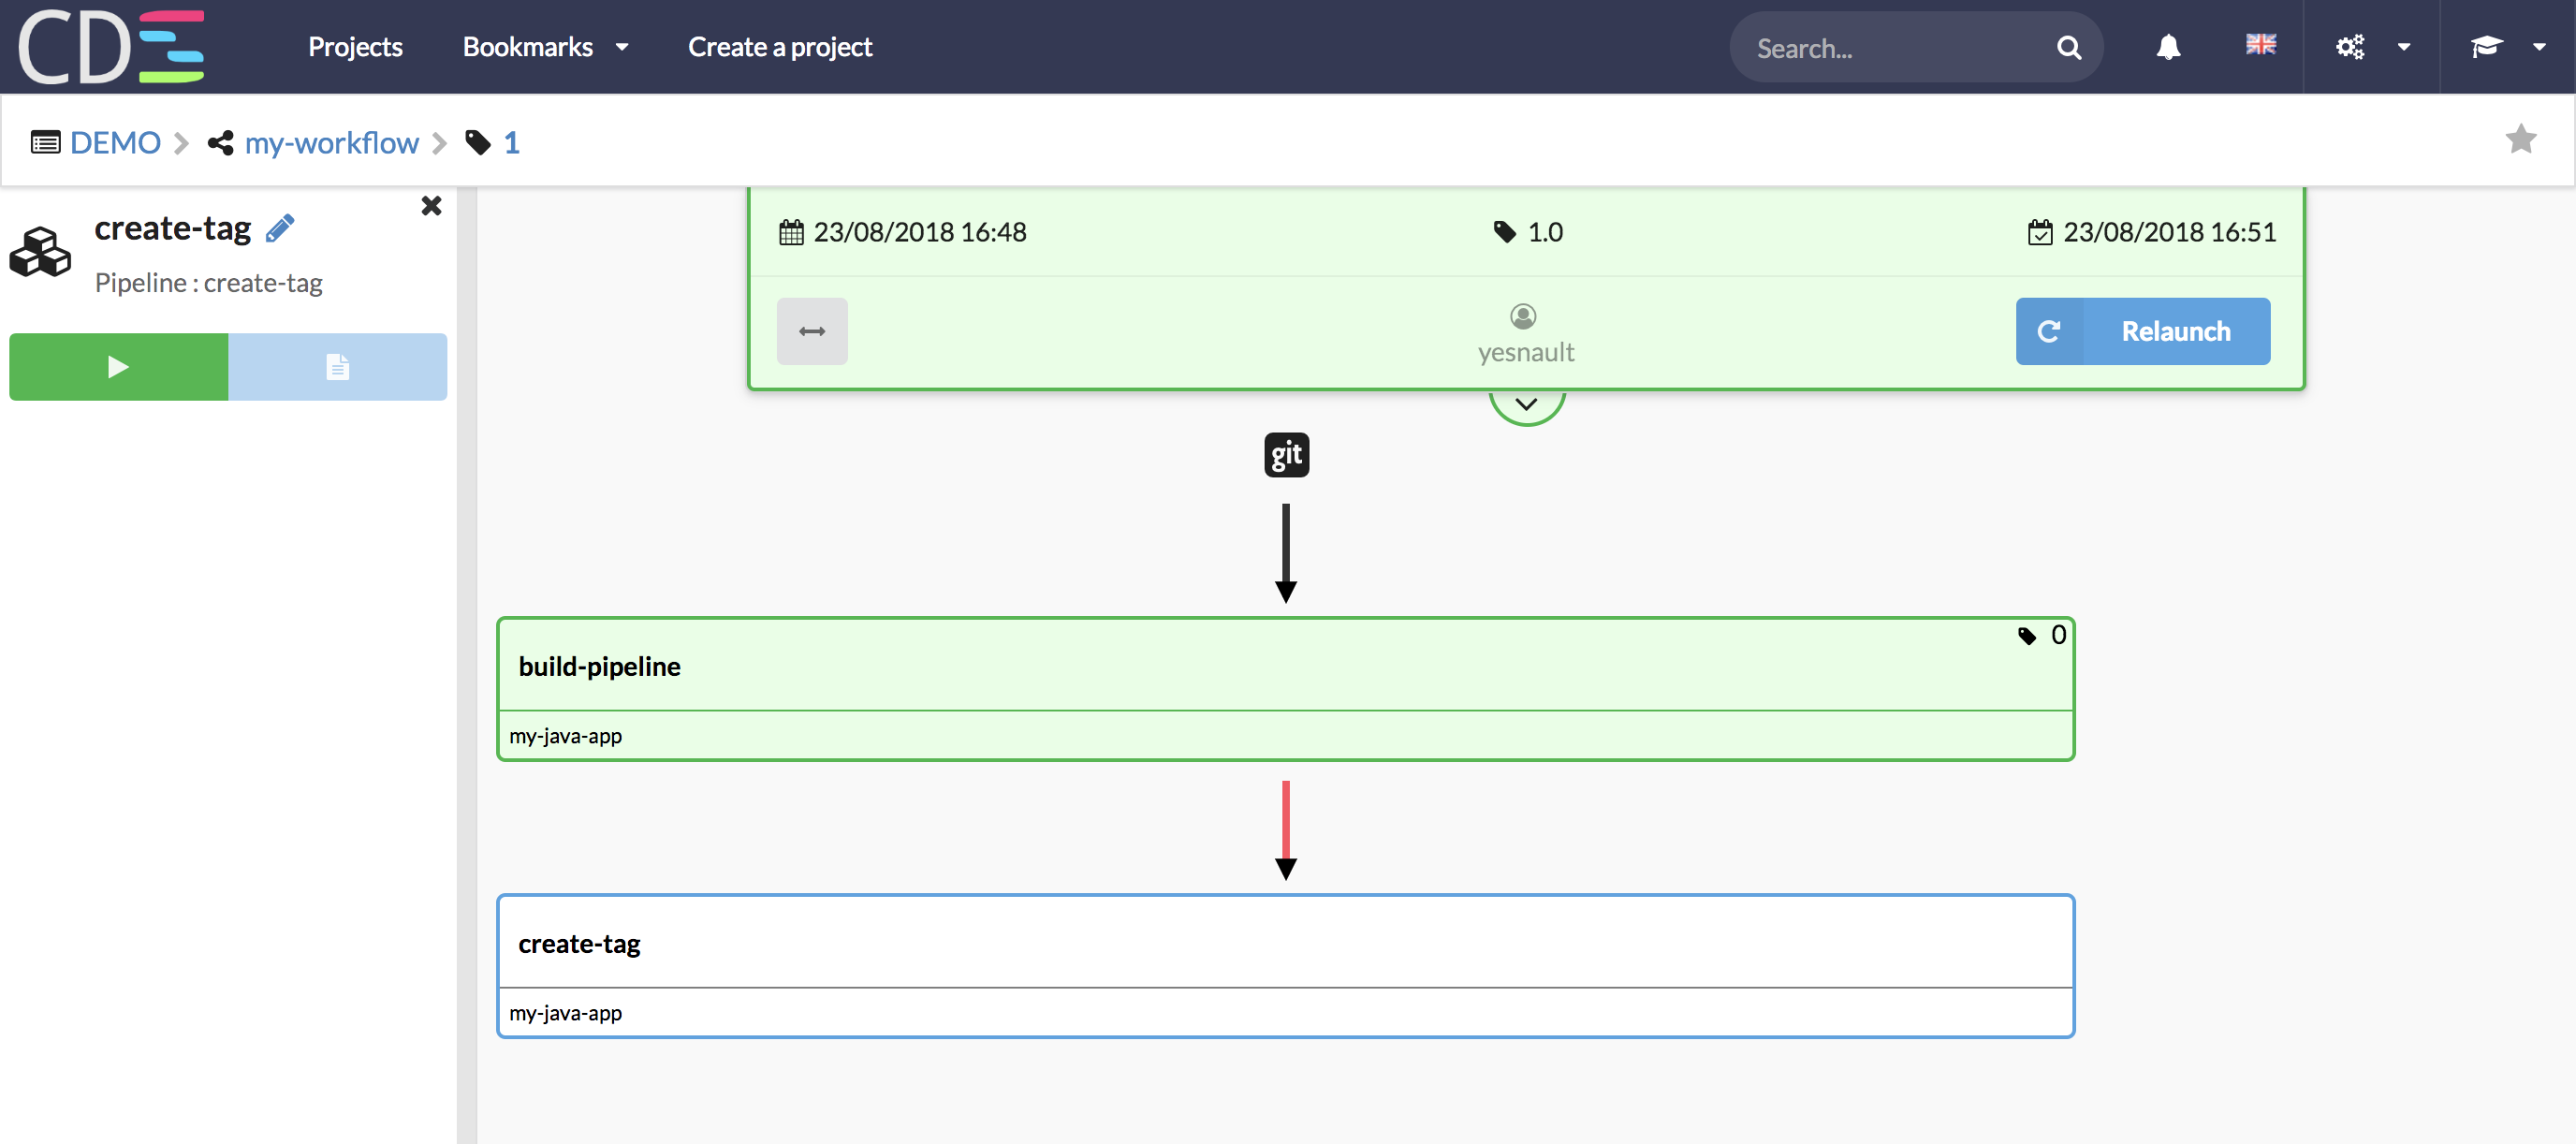
- Select the pipeline root, then click on ‘Add a hook’
- Choose a Git Repository Poller
- The poller is added and linked to your first pipeline
7 - Create a tag
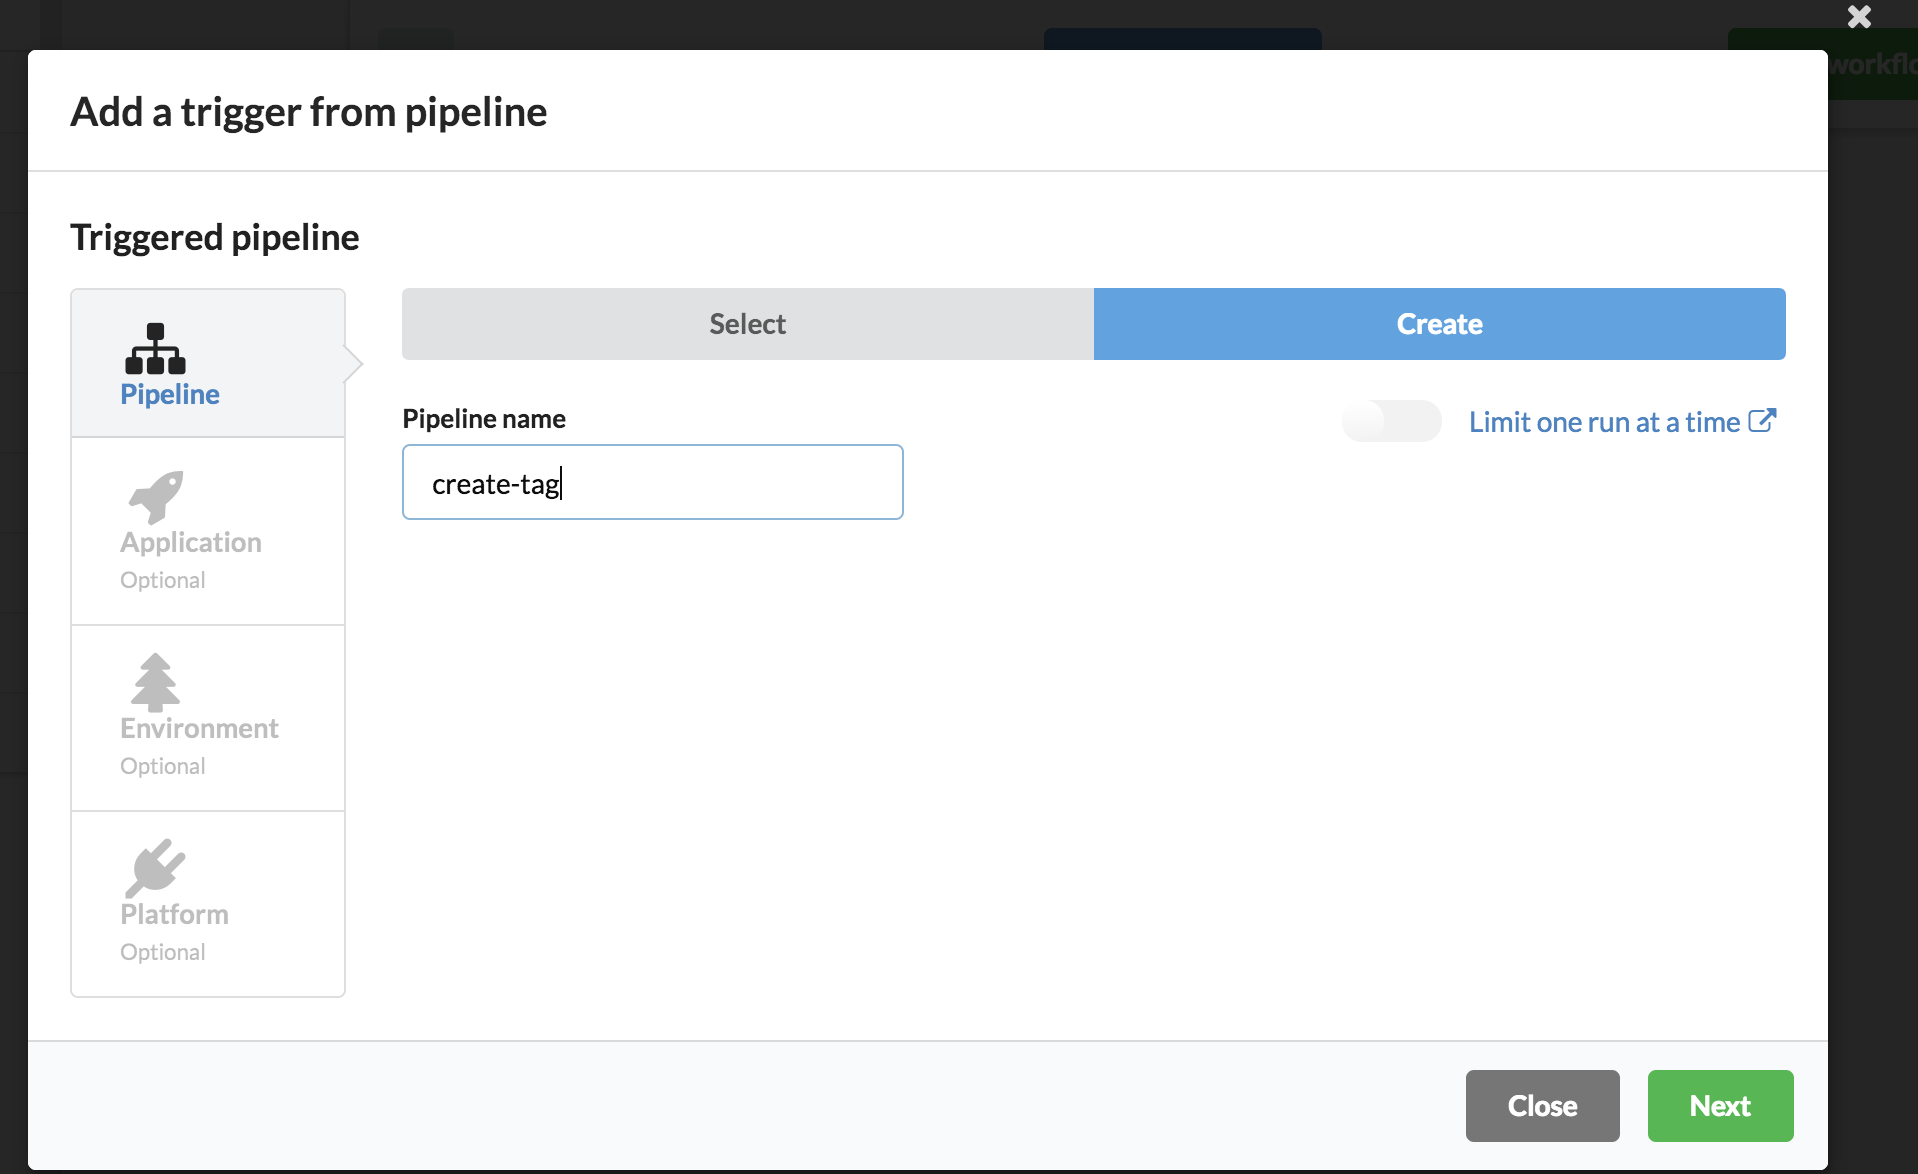
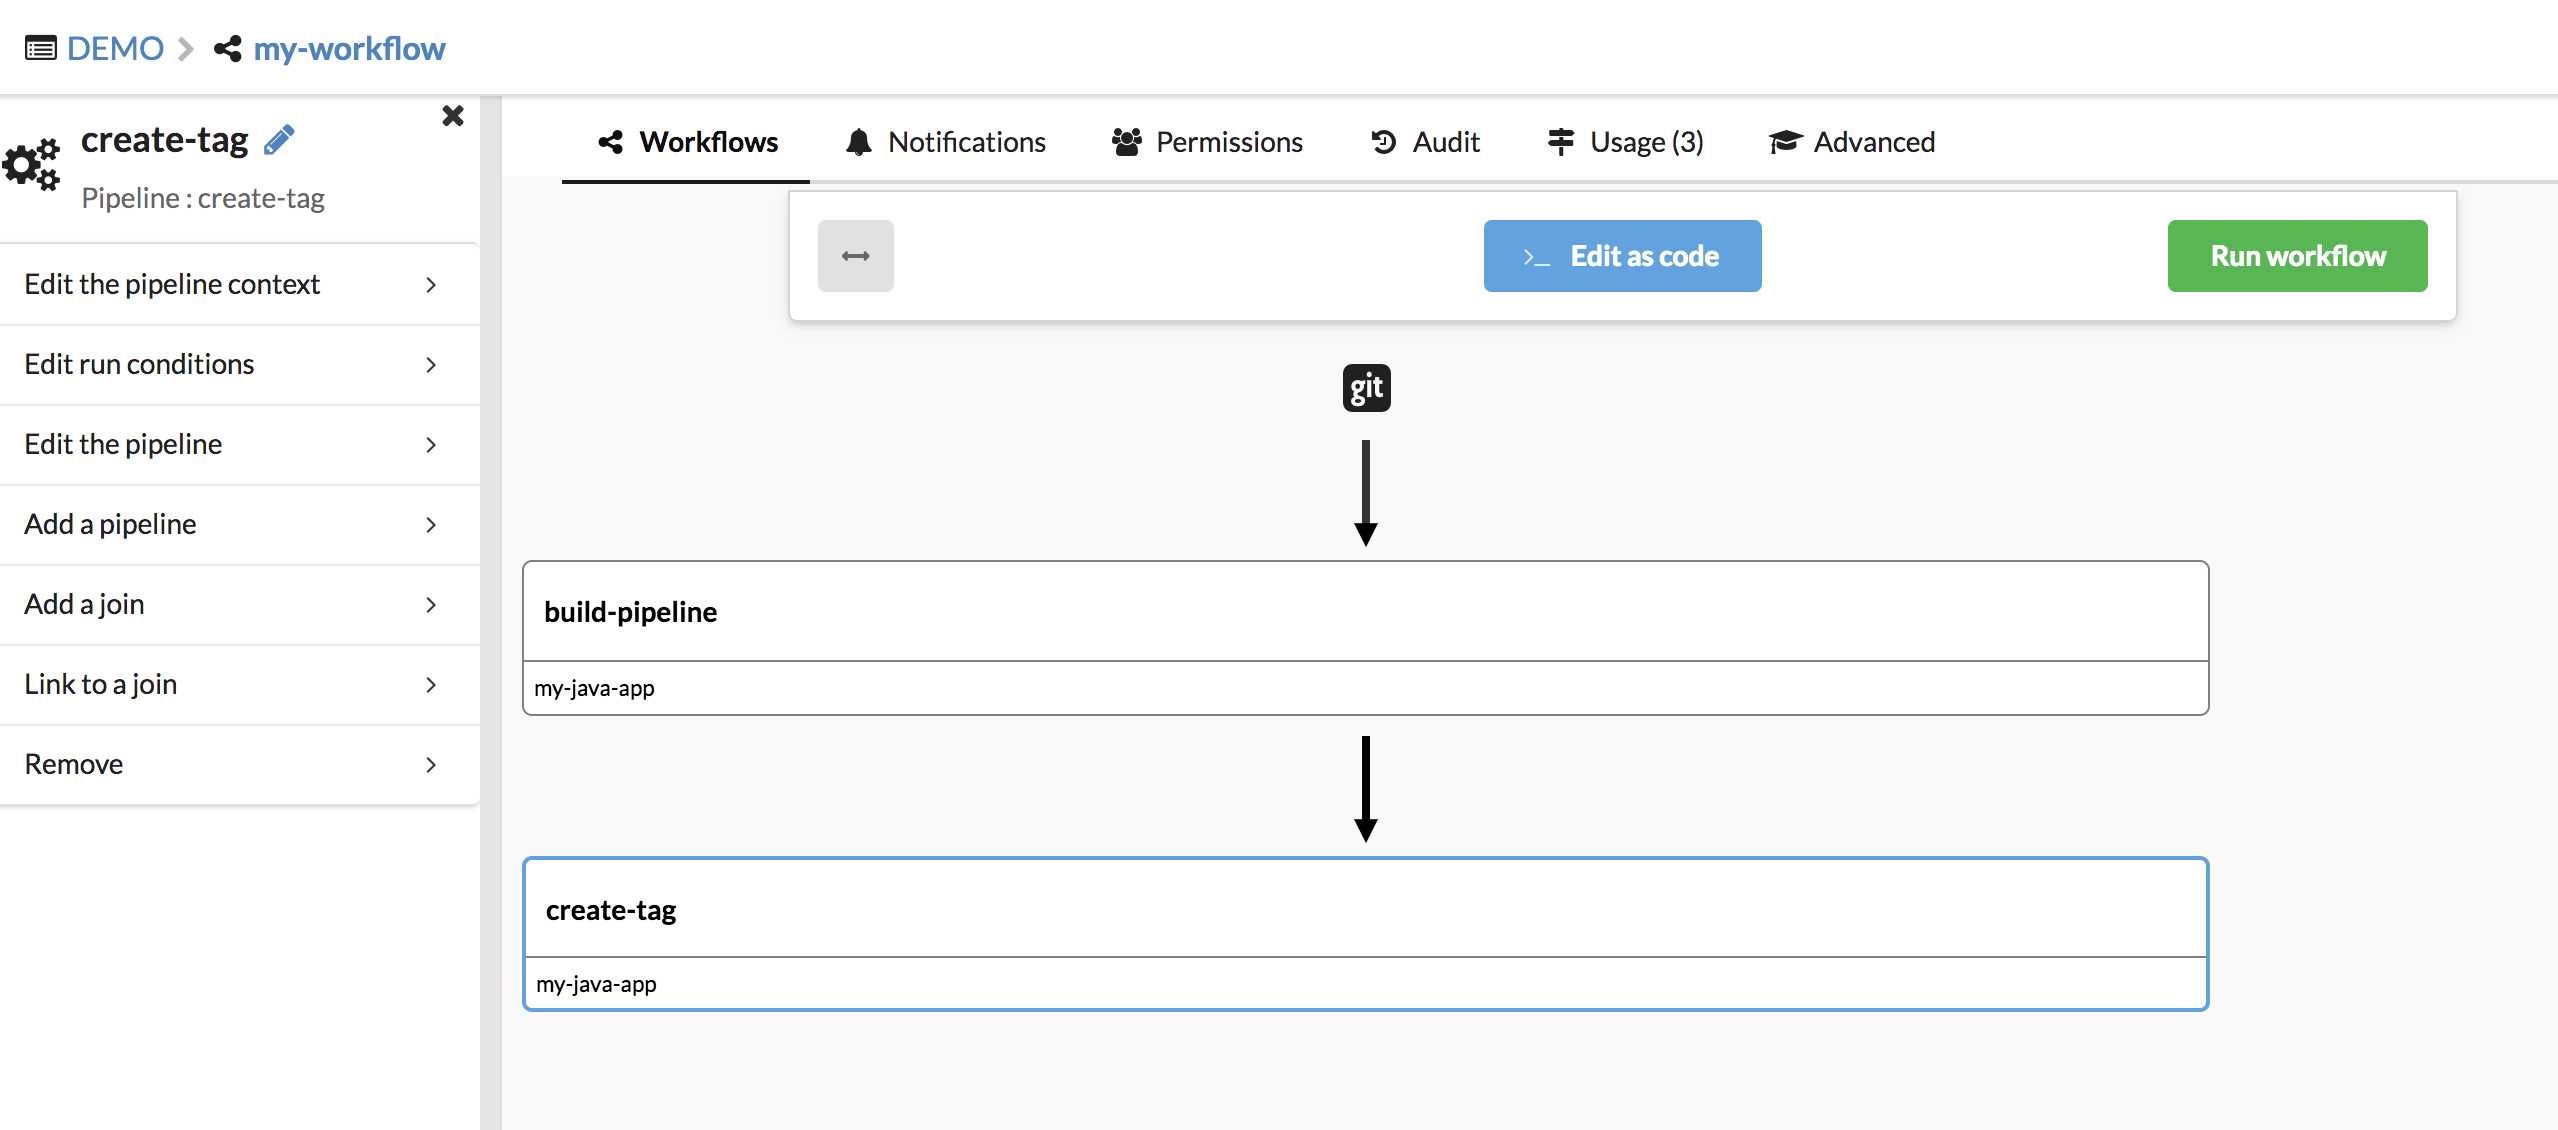
- Select the pipeline ‘build-pipeline’, then click on the sidebar ‘Add a pipeline’
- Create a new pipeline named ‘create-tag’, then select the application ‘my-java-app’
- We don’t need an environment, neither platform for create a tag, Click on ‘Finish’
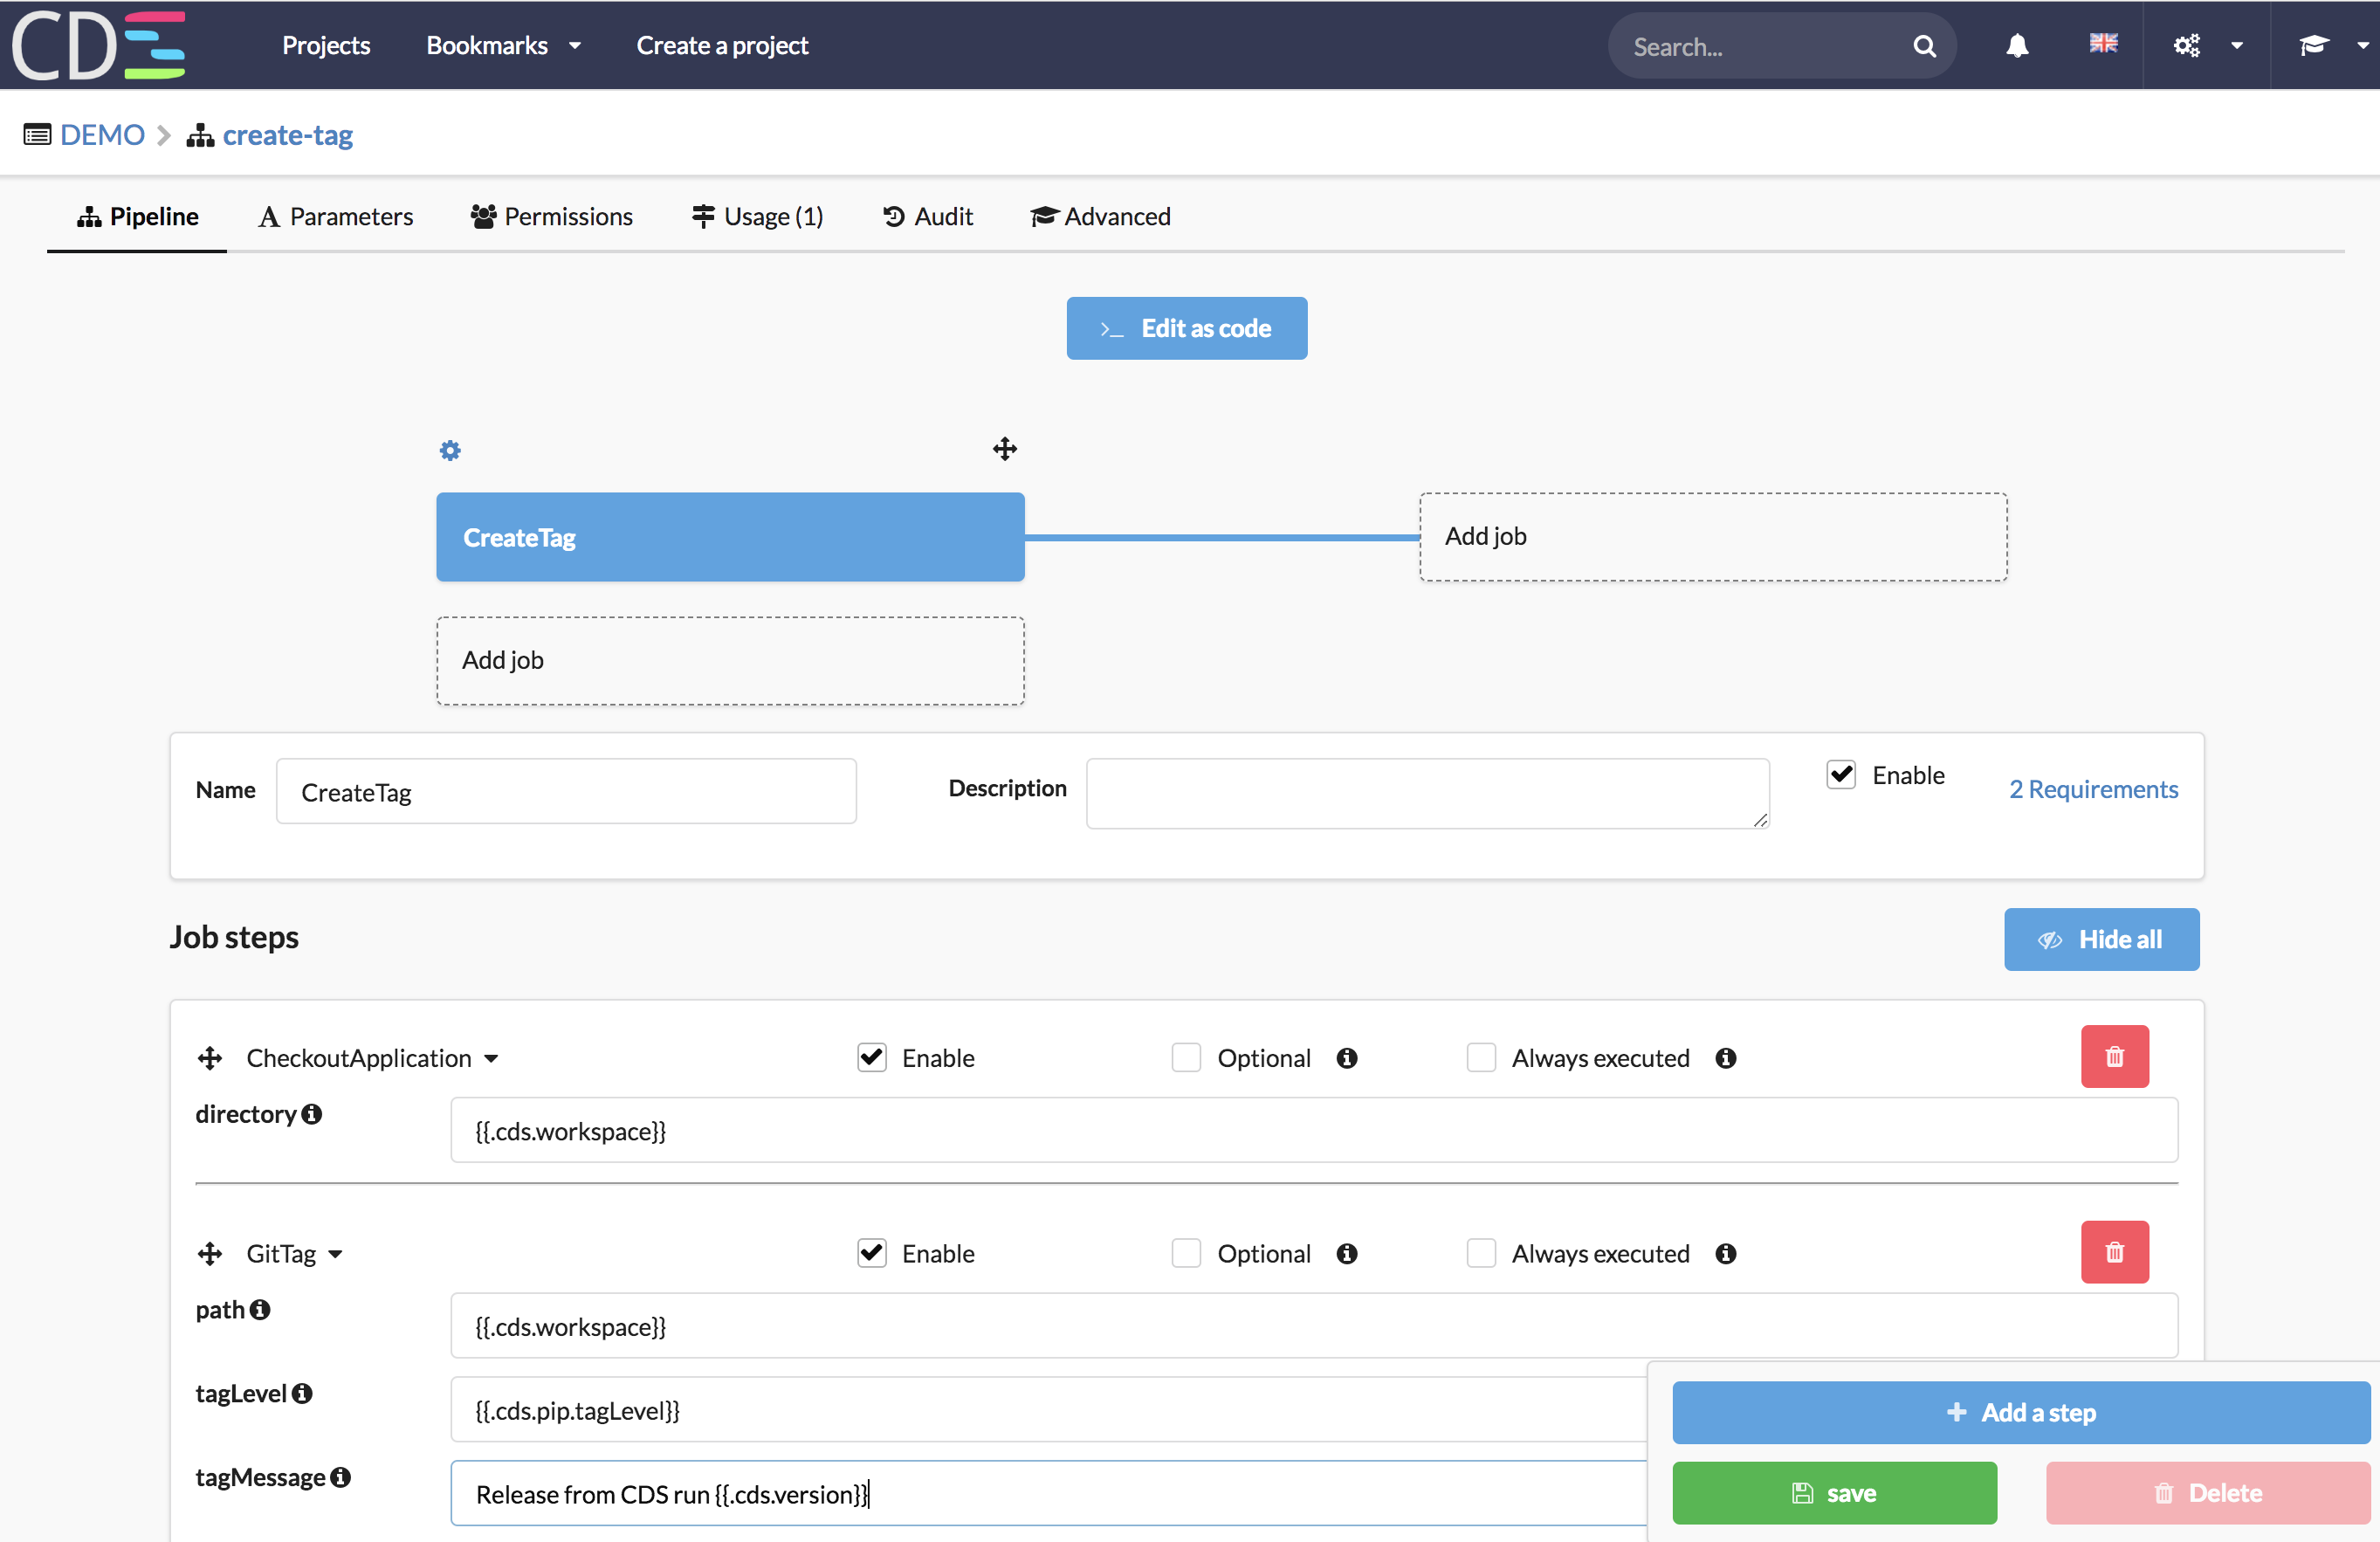
- Edit the pipeline ‘create-tag’
- Click on Edit as Code button, then paste that code:
version: v1.0
name: create-tag
parameters:
tagLevel:
type: list
default: major;minor;patch
description: major, minor or patch
jobs:
- job: CreateTag
steps:
- checkout: '{{.cds.workspace}}'
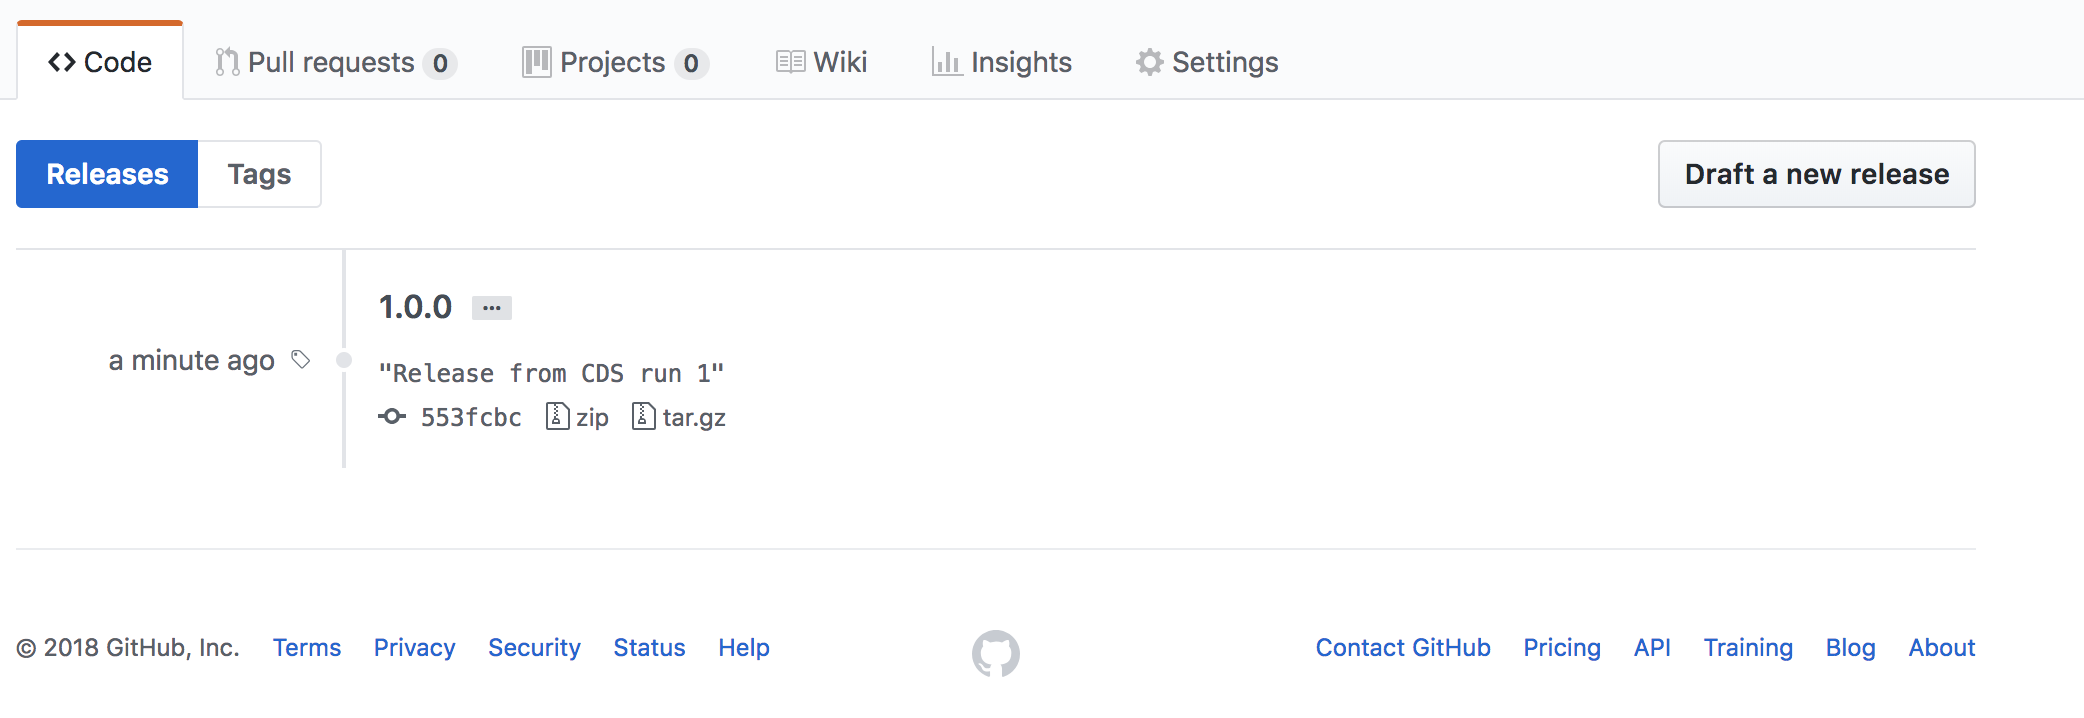
- gitTag:
path: '{{.cds.workspace}}'
tagLevel: '{{.cds.pip.tagLevel}}'
tagMessage: Release from CDS run {{.cds.version}}

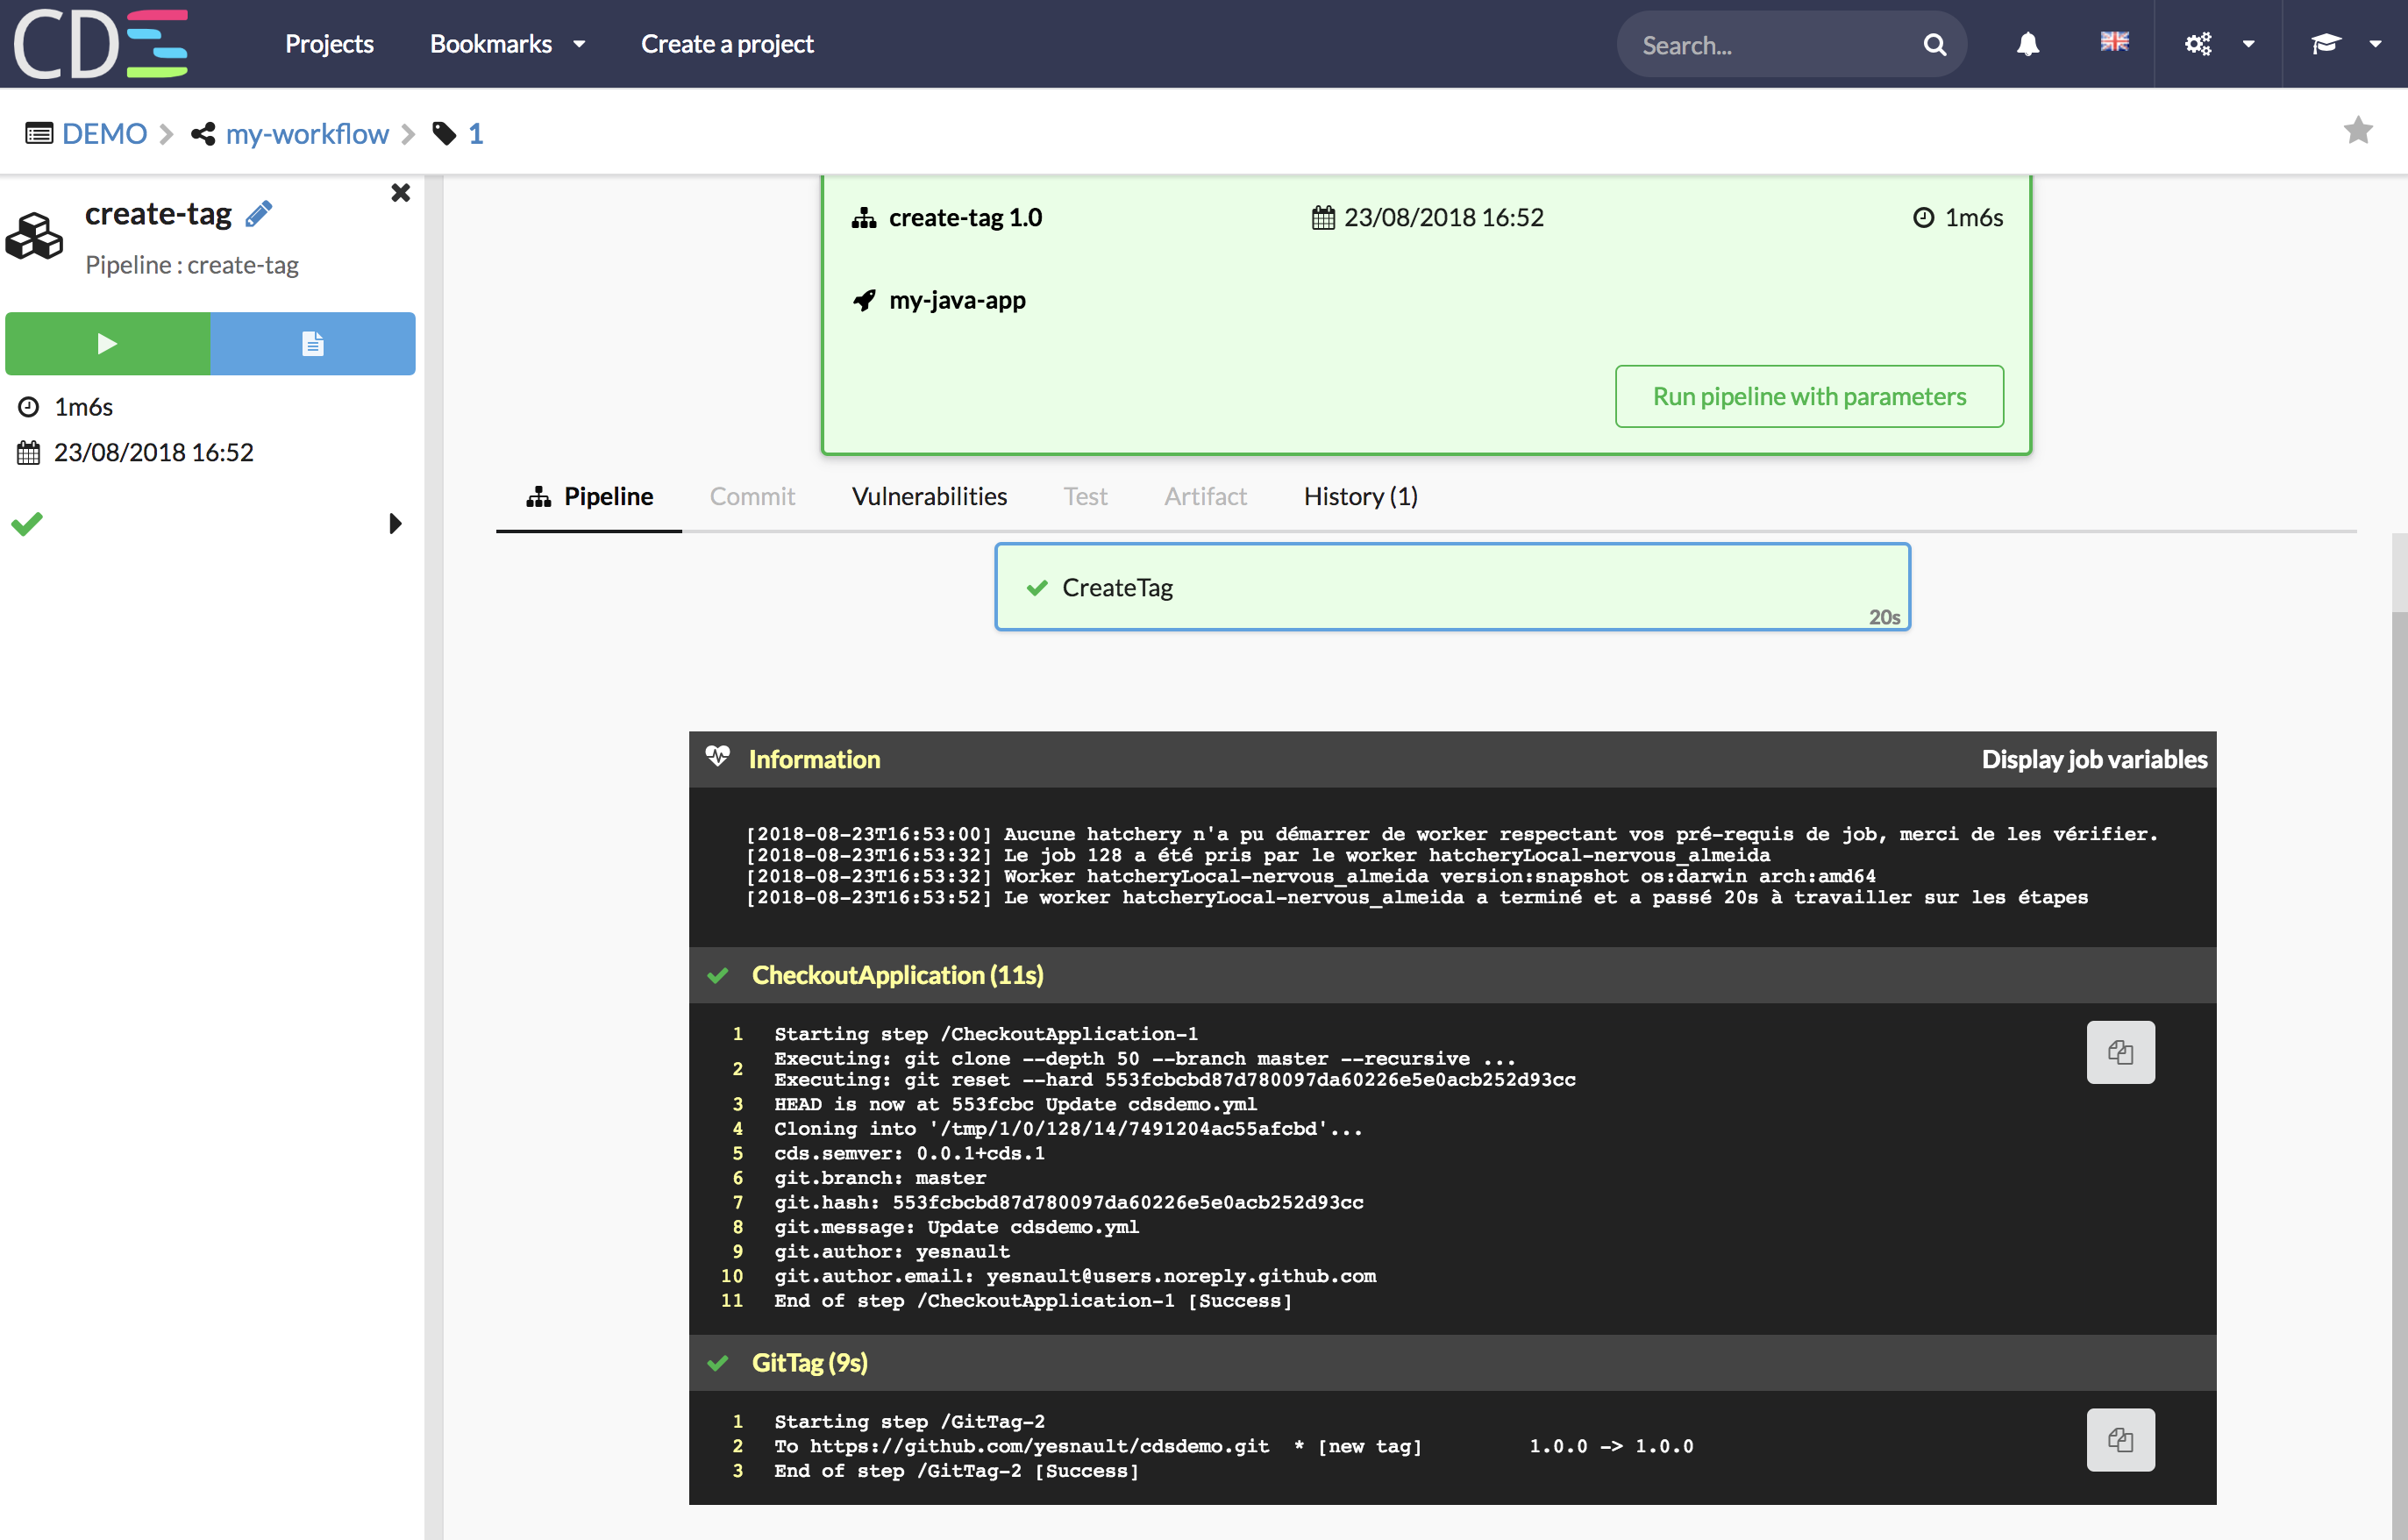
8 - Run Workflow
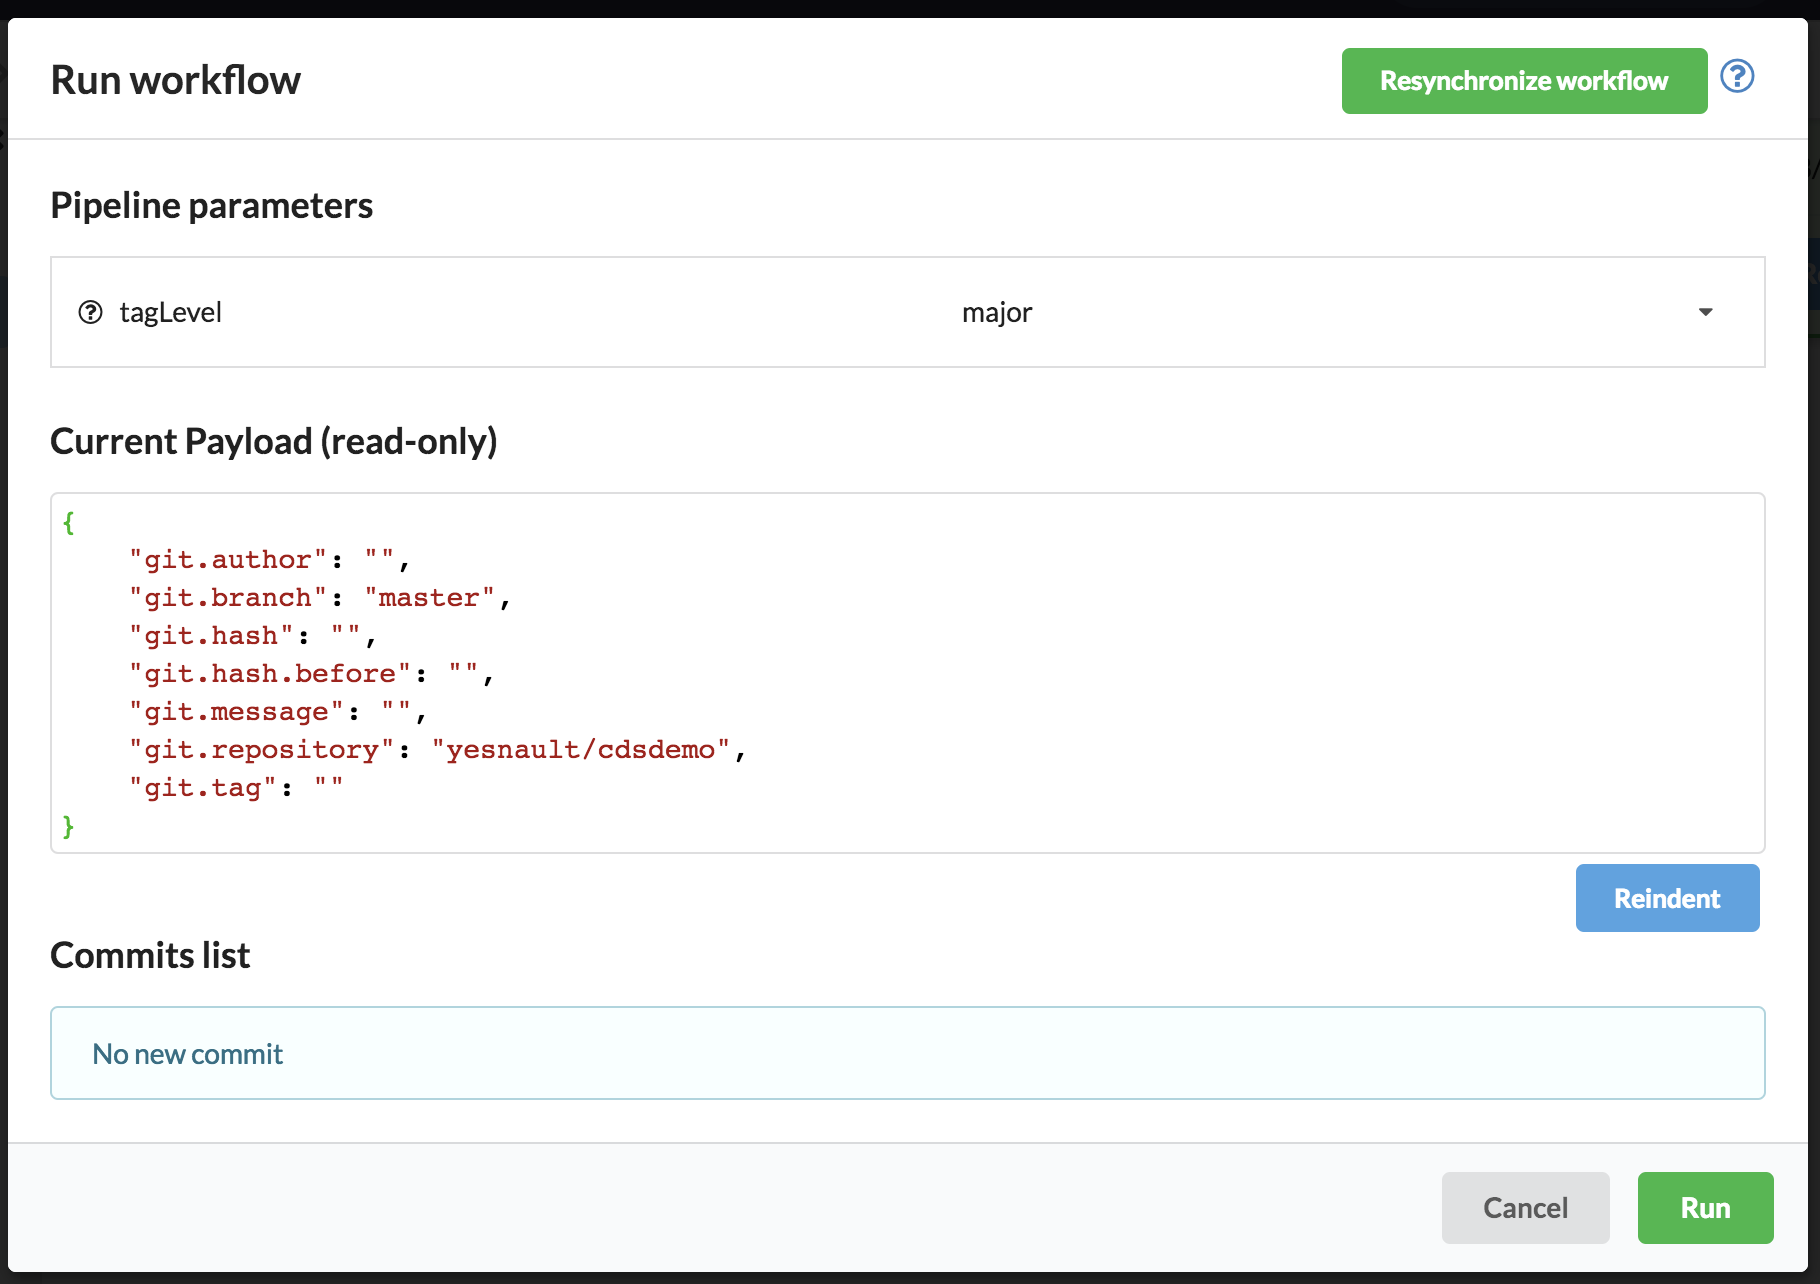
The workflow is now ready to be launched, but before launch it, let’s configure some Run Condition on the pipeline ‘create-tag’. We don’t want to launch it on each commit - we want to decide when to launch it.
- Click on the pipeline ‘create-tag’
- Add two Run Conditions:
- cds.manual = true
- git.branch = master
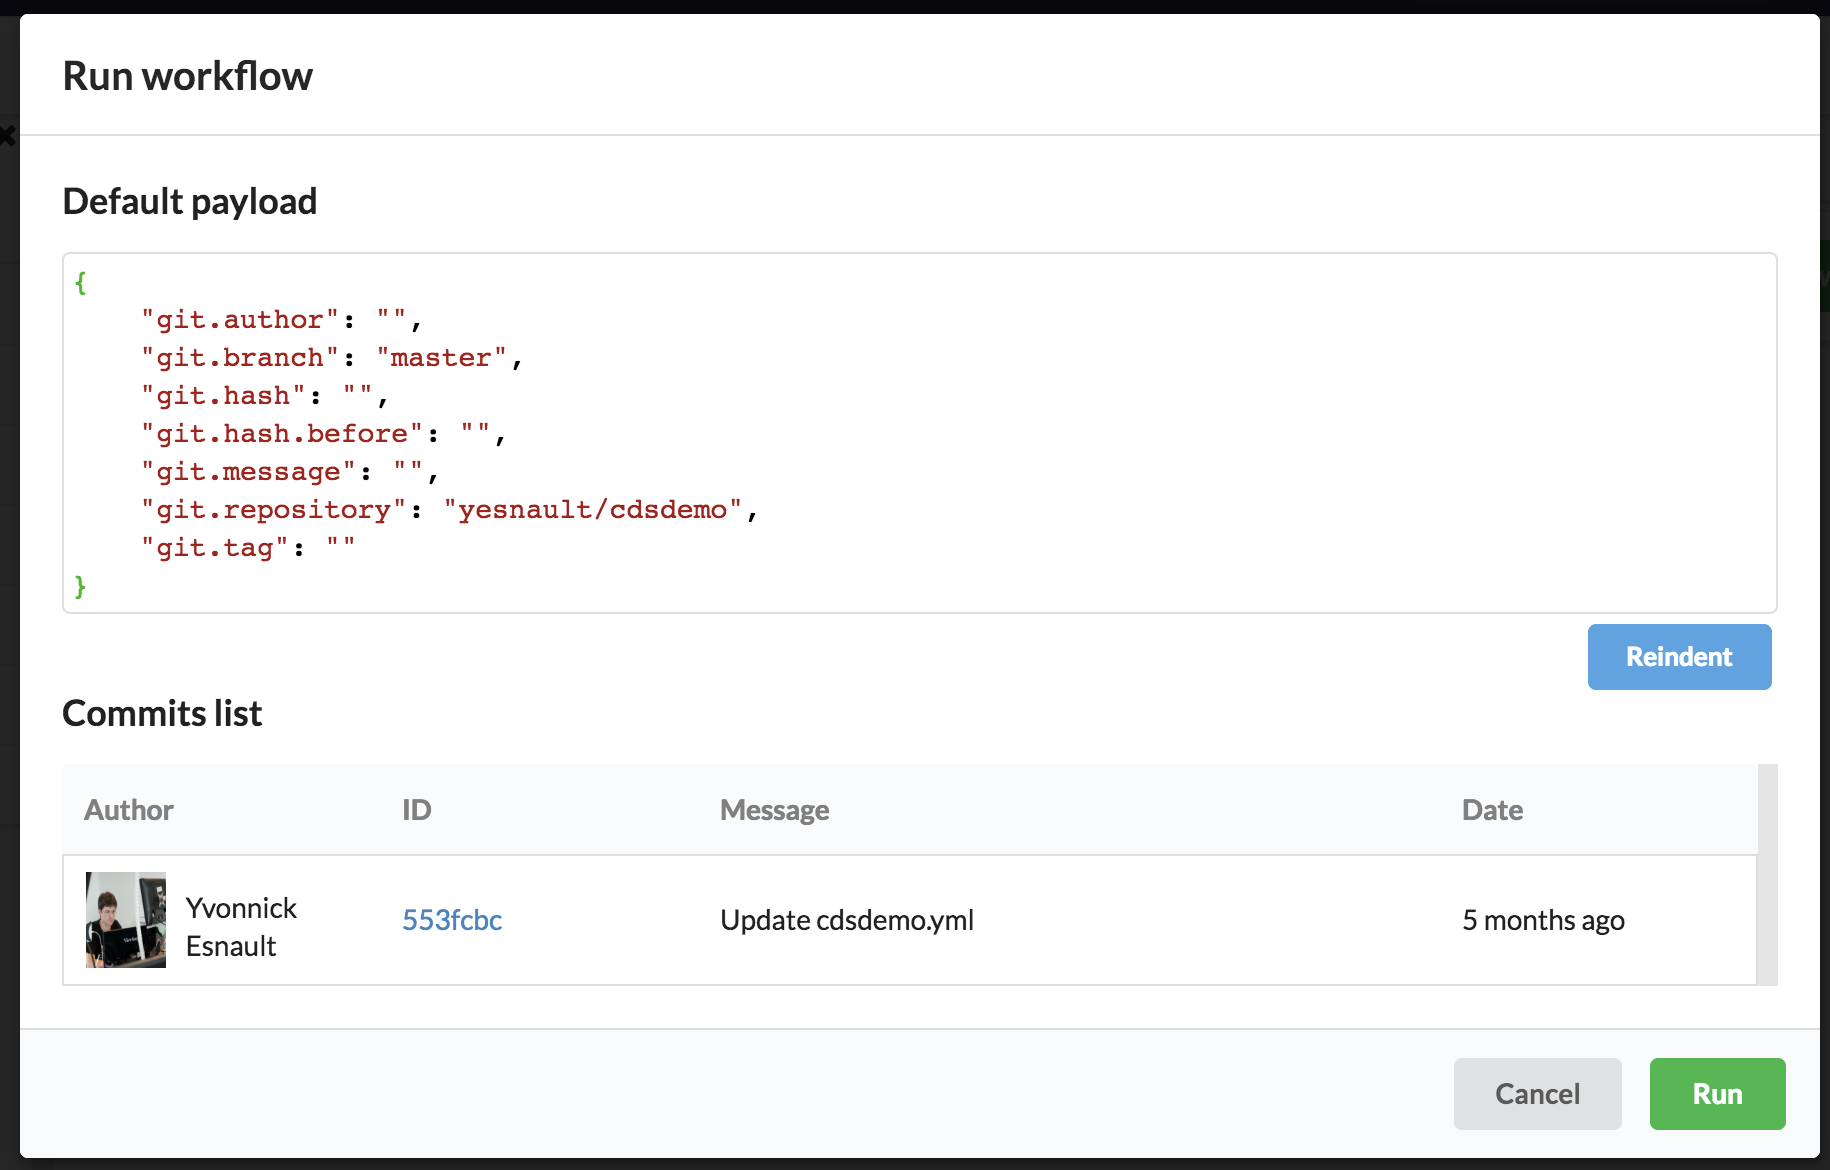
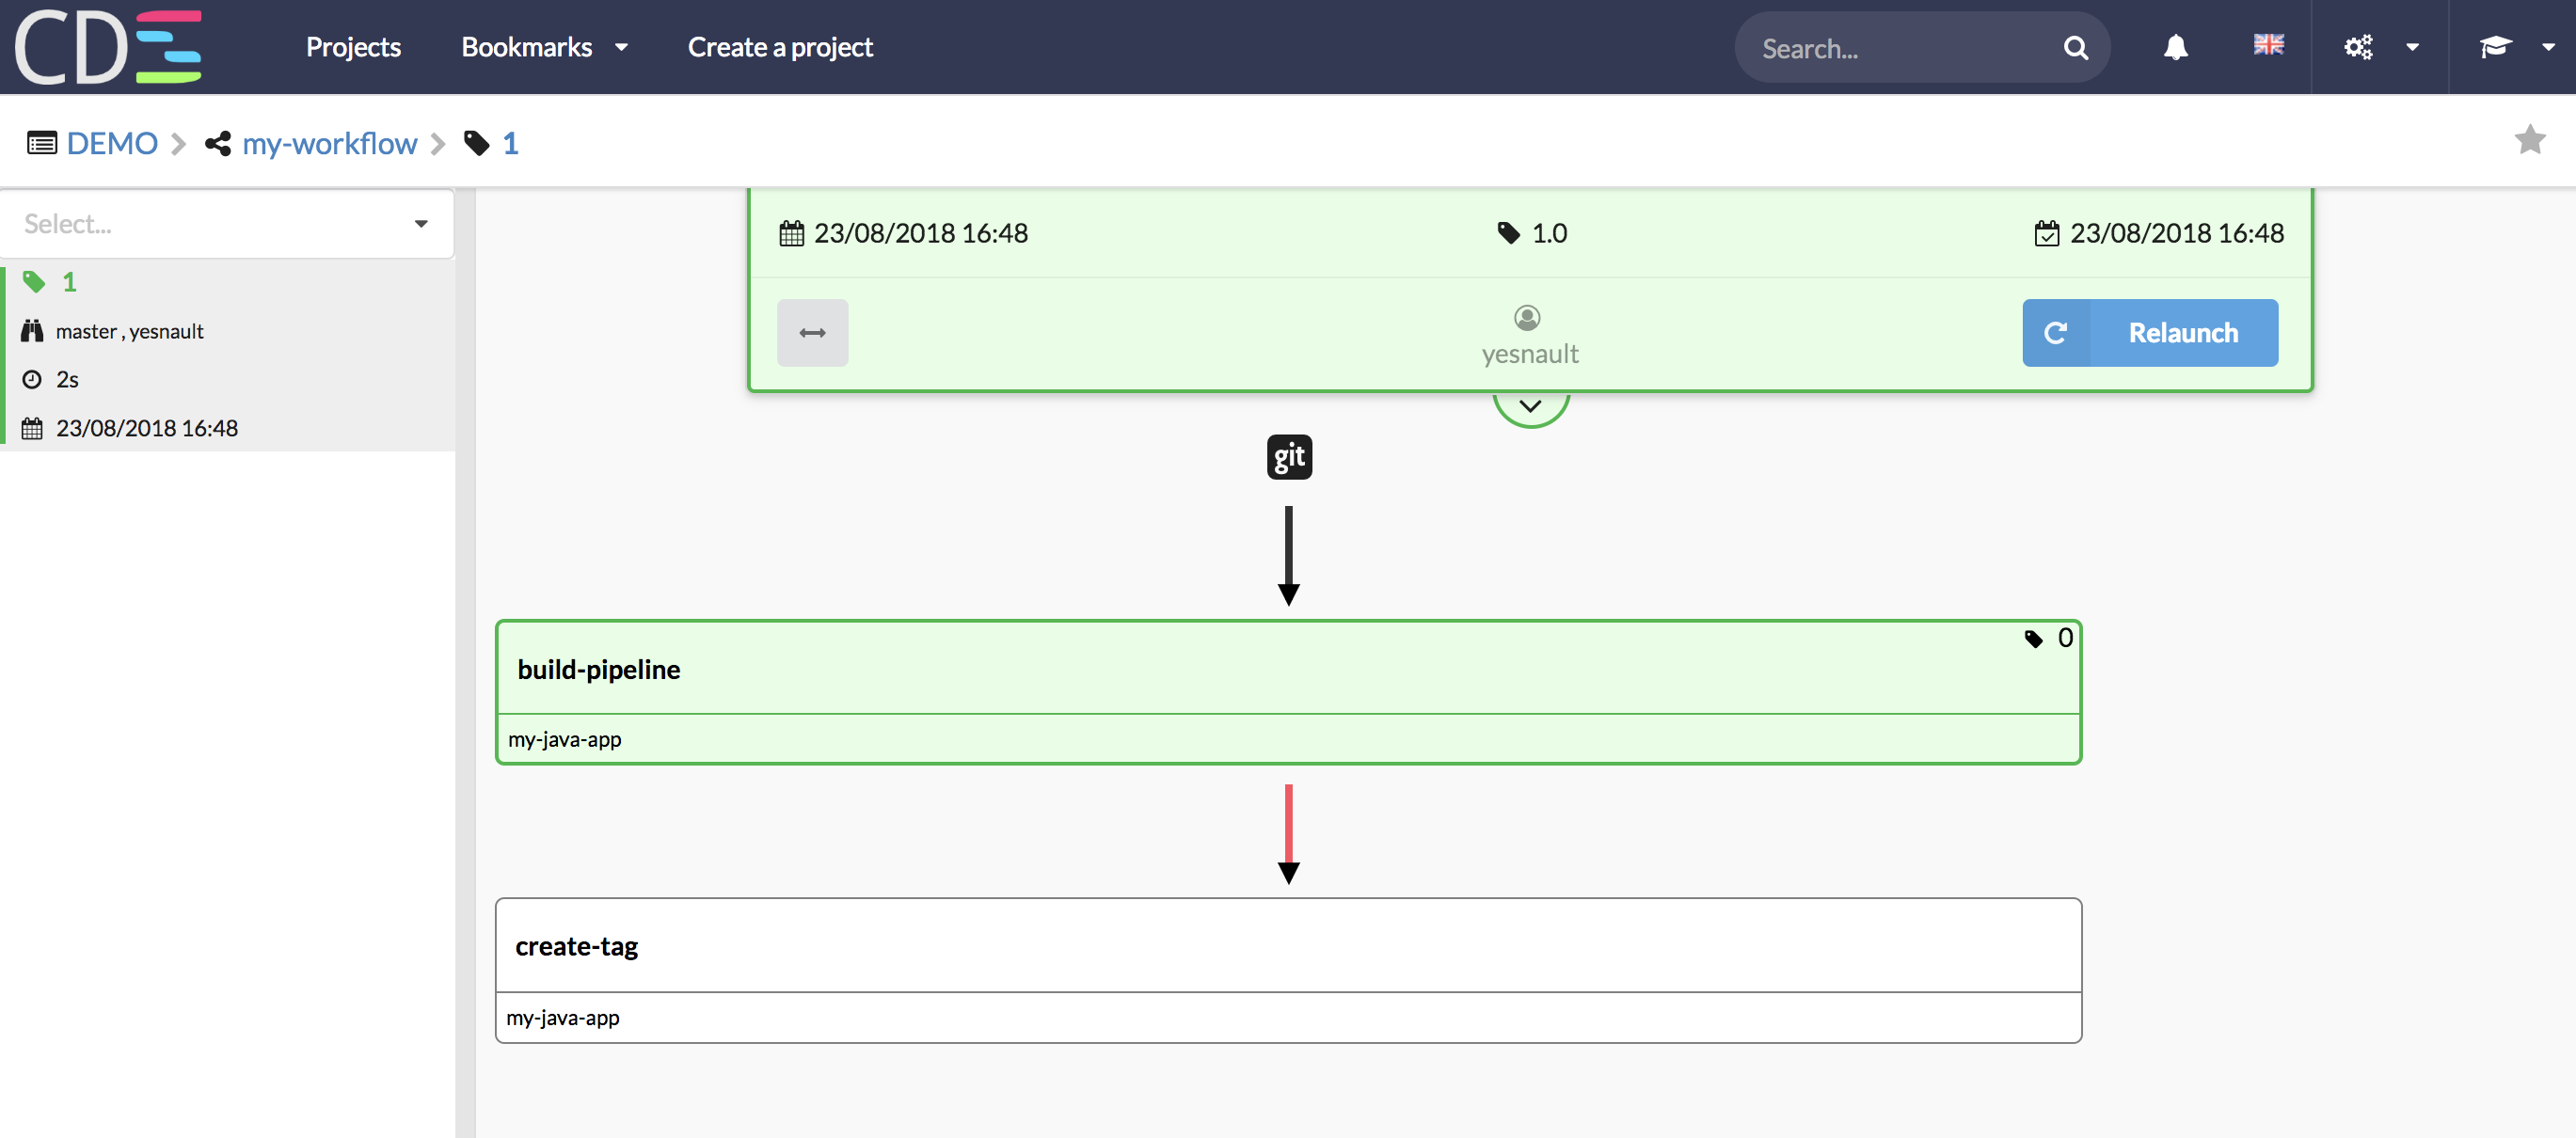
- Launch the workflow, select the tag level, then click on Run

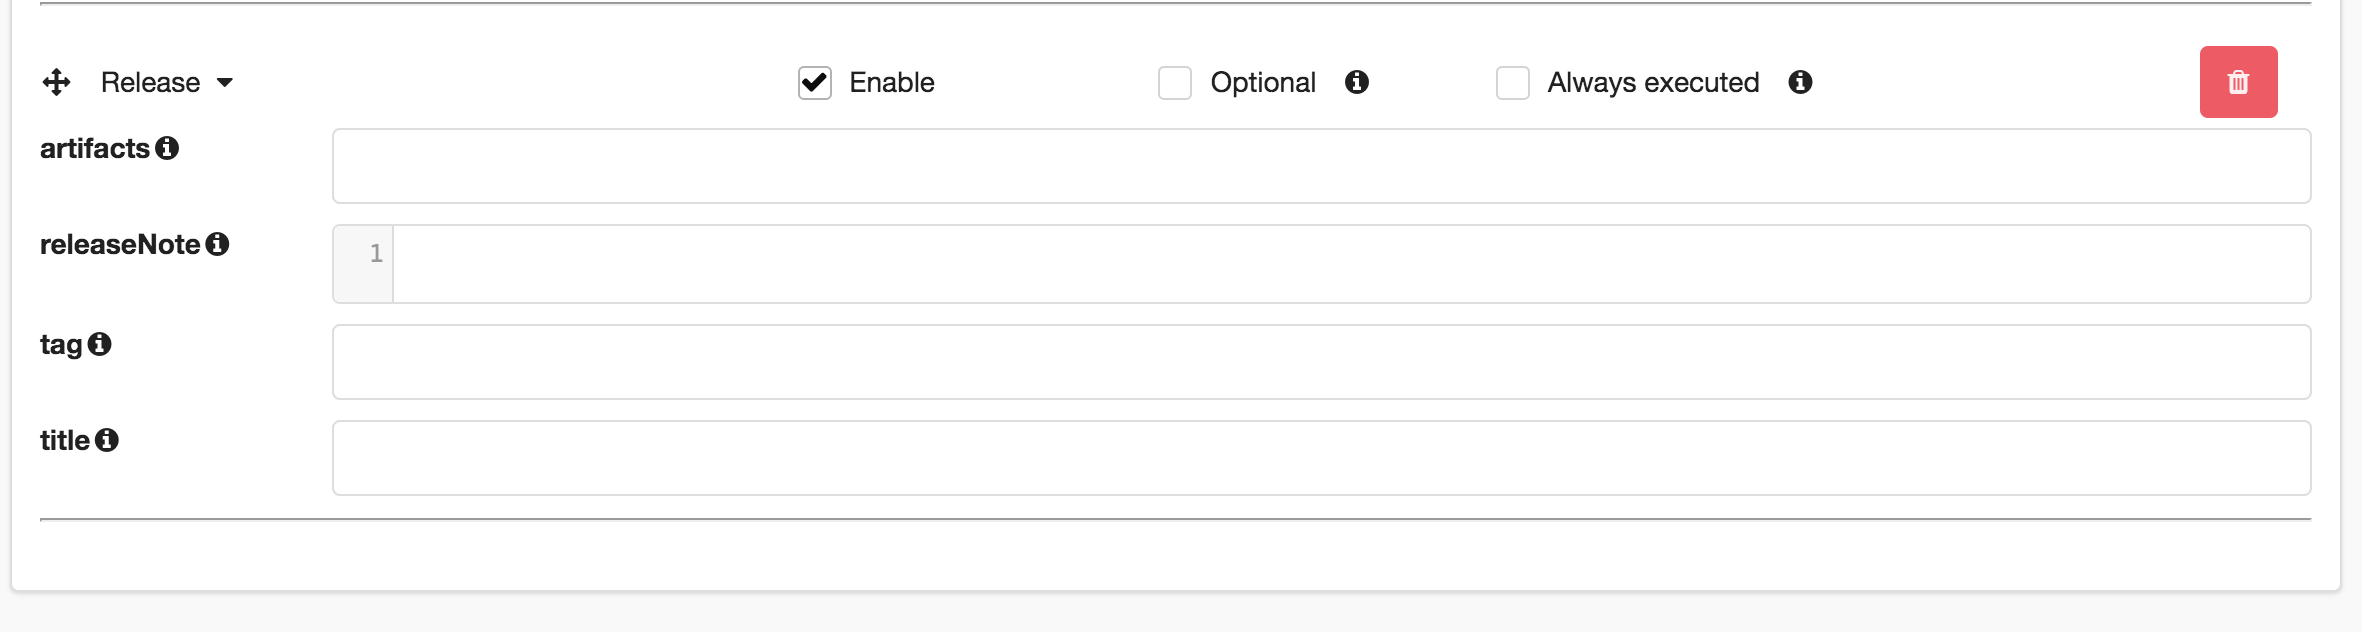
9 - Release Action
Release action action is implemented for GitHub only. You can use it to create a release from a tag and push some artifacts on it.